10 Essential Tips to Grow a Great Garden
Planning a garden can feel overwhelming when you’re unsure what to plant, where to put it, or how to keep it thriving. You’re not alone—many people struggle to get started. These 10 essential tips to grow a great garden will help you make the most of your space and enjoy a healthier, more productive garden.
To grow a great garden, choose a sunny spot and track shadows throughout the day. Select plants suited to your climate, space, and frost dates, then plan mature spacing so crops get light and airflow.
Improve drainage with compost, sow or transplant at the right time, and water deeply as needed. Add two to three inches of mulch to conserve moisture and suppress weeds.
Fertilize according to plant needs, prune and harvest regularly, and check for problems early. Keep going for practical tips on each step.
Key Takeaways
- Track sunlight throughout the day and choose a spot that meets your plants’ light needs.
- Plan spacing around mature plant size, placing taller crops north of shorter ones.
- Select varieties suited to your climate, growing season, and available space.
- Improve soil with compost, test nutrient levels, and apply fertilizer according to plant needs.
- Water deeply, mulch to retain moisture and suppress weeds, and check plants regularly for problems.
Choose a Sunny Spot for Your Garden
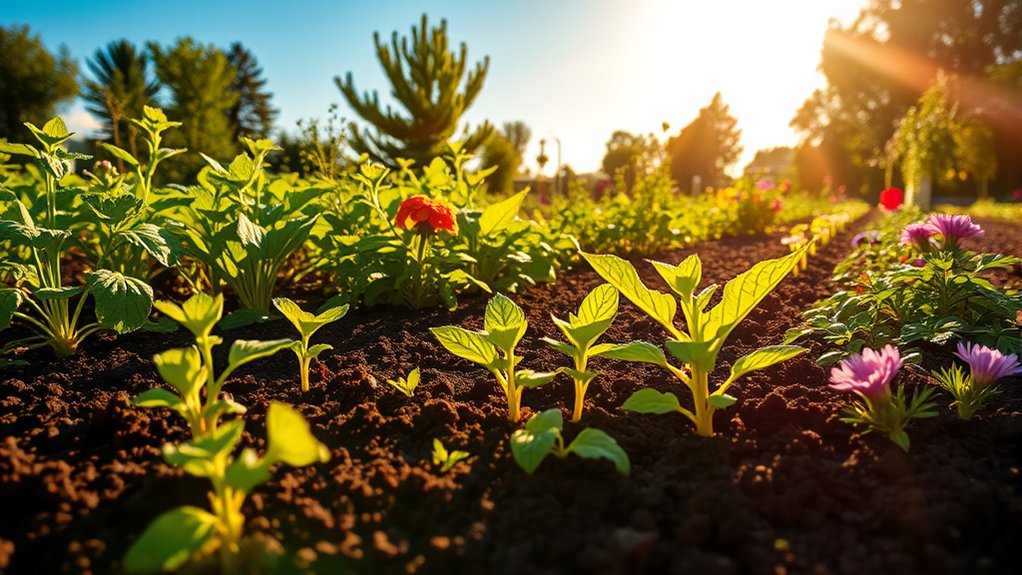
Where will your garden thrive? Start by watching how sunlight moves across your yard. Check the spot in the morning, around midday, and late afternoon to see which areas stay bright and which fall into shadow.
Track sunlight in your yard at different times of day to find the brightest, most promising spot for your garden.
Your observations will help you choose a location that gets consistent light throughout the day.
Look for sunny microclimates near south-facing walls, fences, or paved surfaces. These spots can receive extra warmth and light, even when nearby areas feel cooler.
Don’t assume an open space gets full sun; trees, buildings, and rooflines can cast shadows that shift with the seasons.
Give shade considerations equal attention. Note where shadows linger, especially if nearby structures block the sun for several hours.
You can use a simple sketch to map bright and shaded zones, then compare them at different times. Choose a level, accessible site where you can work comfortably and reach it easily.
A few days of careful observation can prevent a poor placement choice and help you make the most of your outdoor space.
Choose Plants That Fit Your Climate and Space
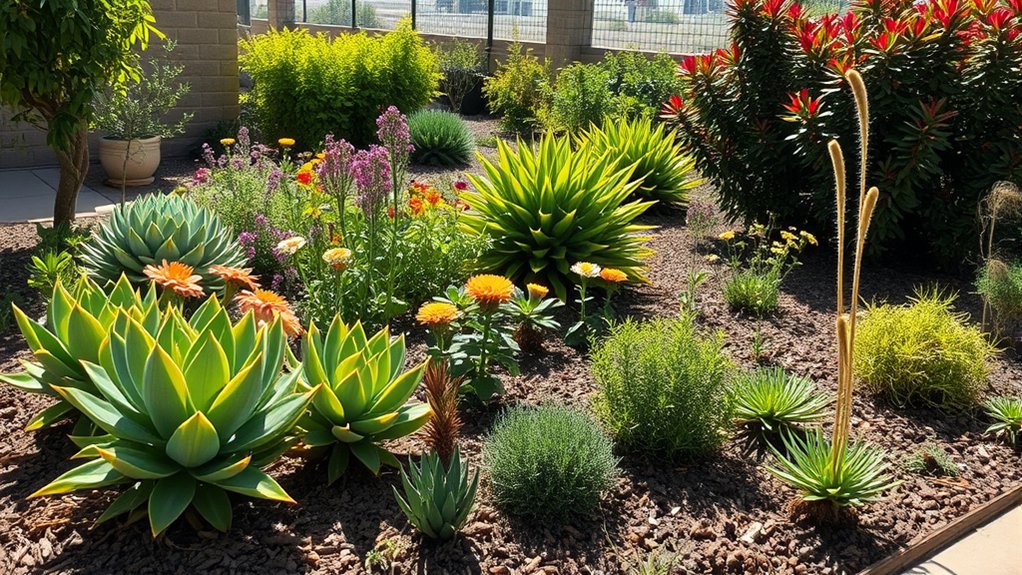
Once you’ve chosen a sunny spot, match your plants to your local climate and the space you have. Check your region’s hardiness zone and typical first and last frost dates before you buy seeds or seedlings.
Choose varieties that thrive in your temperatures and growing season, so you won’t struggle to keep them healthy. If summers run hot, look for heat-tolerant crops; in cooler areas, pick plants that mature quickly.
Think about how much room you can give each plant. If you have a small yard, choose compact varieties or try container gardening with pots suited to your crops.
Herbs, leafy greens, and cherry tomatoes often grow well in containers. You can also use companion planting to pair compatible crops, such as basil with tomatoes, and make the most of your choices.
Read plant labels for mature size and care needs, then select a manageable mix you’ll enjoy growing and eating. Start with a few reliable favorites before experimenting with unfamiliar varieties.
Plan Your Garden Layout and Plant Spacing
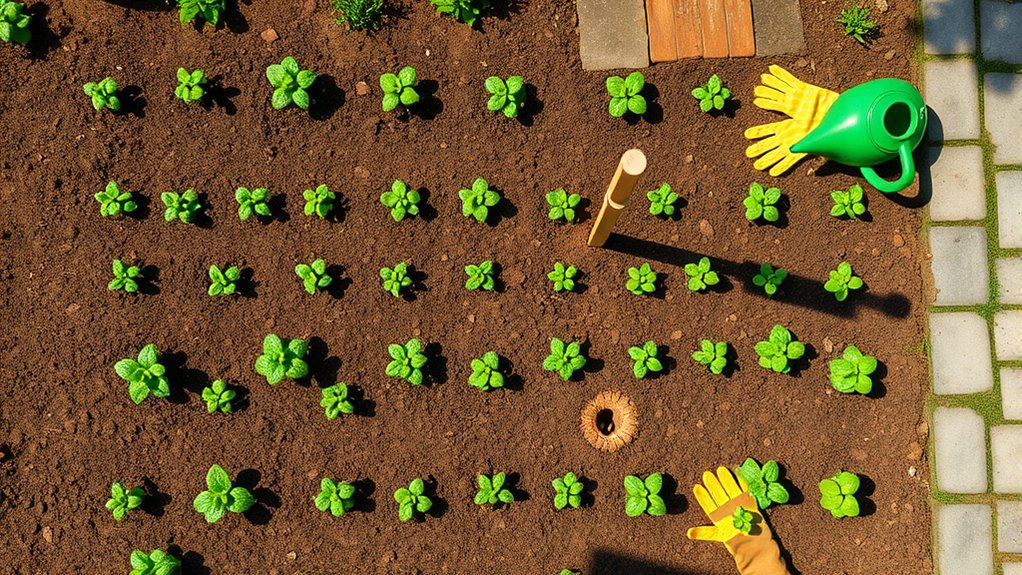
Before planting, sketch your garden layout to make the most of your space and sunlight. Note where shade falls, then place taller crops on the north side so they won’t block shorter plants.
Check each plant’s mature width, not just its size at planting, and leave enough room for airflow and easy harvesting.
| Garden feature | Planning choice | Benefit |
|---|---|---|
| Tall crops | North edge | Keeps shorter plants sunny |
| Wide crops | Spaced by mature width | Prevents crowding |
| Containers | Near water access | Simplifies daily care |
Use companion planting to pair compatible crops, such as basil with tomatoes, while keeping plants with conflicting needs apart.
If your yard is small, try container gardening on a sunny patio or arrange pots vertically. Mark paths before you plant; even a narrow route helps you reach every bed without stepping on growing areas.
Review your sketch as plants mature, and adjust supports or containers when needed. A thoughtful layout helps you use every patch efficiently and care for plants without damaging nearby growth.
Build Healthy, Well-Draining Soil
Healthy soil gives roots the air, water, and nutrients they need to thrive. Start by checking your soil’s texture and drainage. Squeeze a handful of damp soil: if it forms a hard lump, add organic matter to loosen it. If it falls apart immediately, compost can help it hold moisture.
Check your soil’s texture and drainage to see whether it needs organic matter or compost.
For heavy clay or sandy ground, spread a layer of finished compost over the surface and work it gently into the top few inches.
Composting benefits your garden in several ways. It improves soil structure, supports beneficial soil life, and returns nutrients to the ground. Add well-rotted compost, shredded leaves, or aged manure, but avoid fresh manure, which can damage plants.
Keep the soil covered with mulch to reduce evaporation, limit erosion, and feed organisms as the material breaks down.
Water the area and observe how quickly moisture drains. If water pools, improve drainage with organic matter or raised beds. Recheck soil conditions each season and amend as needed.
Plant Seeds and Seedlings at the Right Time
Planting at the right time helps your garden thrive. Before sowing seeds or setting out seedlings, check your local frost dates. Then follow the timing instructions on each seed packet to give your plants the best start.
Check Local Frost Dates
Check your local frost dates before sowing seeds or setting out seedlings, since a late frost can damage tender plants and an early one can cut the growing season short. Your area’s typical last spring frost and first fall frost offer useful guideposts, but they’re estimates, not guarantees.
Check records from a nearby weather station or local gardening service, and consider how your yard’s elevation, shade, and exposure may affect temperatures. Frost date awareness helps you judge when outdoor conditions are likely to become safer and how much time you have before cold returns.
Use these dates for planting calendar planning, leaving room to adjust when forecasts change. Keep an eye on local weather as each date approaches, and protect vulnerable plants when an unexpected cold snap threatens. Don’t assume every year follows the average.
Follow Seed Packet Timing
Follow the timing on seed packets to give seeds and seedlings the conditions they need to grow. Each packet explains when to sow, how deep to plant, and how much space to leave. Check those details before you begin, since seed timing varies by crop and climate.
Look for indoor-starting and outdoor-sowing dates, then compare them with your local frost dates. Some seeds need warm soil, while others sprout best in cool conditions. Pay attention to germination windows, too: if a packet says seeds take two weeks to emerge, keep the soil moist and wait before assuming they’ve failed.
When you transplant seedlings, follow the packet’s spacing and hardening-off advice. Staggering sowings can extend your harvest, especially for quick-growing crops. Keep packets handy so you can track dates, varieties, and results throughout the season.
Water Your Garden Deeply and Consistently
Water your garden deeply and consistently to encourage strong roots and healthy growth. Give water time to soak into the soil, reaching the roots rather than just wetting the surface. Aim for steady moisture, adjusting your routine when rainfall or temperatures change.
- Check the soil before watering. Press a finger an inch into the ground; if it feels dry, water slowly.
- Water early in the day. You’ll lose less moisture to evaporation, and leaves have time to dry.
- Focus water at the base of each plant. Drip irrigation delivers it directly to roots and helps you avoid waste.
- Keep a simple schedule, but stay flexible. Rainwater harvesting can supply your garden, and recent rain may mean you can skip a session.
New seedlings and containers may need more frequent attention than established plants. Watch for wilting, but don’t rely on it alone: some plants droop in afternoon heat and recover later. Check soil again before adding more water, since soggy roots can suffer.
Mulch to Hold Moisture and Control Weeds
After watering deeply, spread mulch over the soil to help it stay moist. Mulch also helps keep weeds down, which means less time spent pulling them. Just choose a type that suits your plants and garden conditions.
Retain Soil Moisture
Mulch helps your garden hold moisture and keeps weeds in check. A two- to three-inch layer slows evaporation, so your soil stays damp longer and your plants need less frequent watering.
Choose organic mulch, such as shredded leaves or bark, and keep it a few inches from stems to prevent rot. Use these simple steps to make your mulch work harder:
- Water the soil deeply before spreading mulch.
- Check moisture beneath the surface, not just on top.
- Refresh thin or decomposed mulch as needed.
- Adjust watering schedules after rain or during hot spells.
Pair mulch with drought strategies, such as grouping plants with similar water needs. You’ll conserve water, support steady growth, and spend less time tending dry beds throughout the growing season.
Suppress Weed Growth
Weeds compete with garden plants for water, nutrients, and light, but a well-placed layer of mulch can slow their growth. Spread mulch evenly around your plants to block sunlight from reaching weed seeds. Leave a small gap around each stem to prevent excess moisture from collecting against it.
Before you mulch, pull existing weeds so they don’t keep growing beneath the cover. A layer about two to three inches deep usually supports effective weed control while still allowing water to reach the soil. Check the garden regularly, and remove weeds that emerge through thin spots before they spread.
Your mulch selection can affect how well the layer suppresses weeds, so choose a material that forms a consistent cover. Refresh the layer as it breaks down, maintaining coverage without piling mulch too deeply.
Choose the Right Mulch
Choose mulch based on your garden’s needs: fine-textured materials, such as shredded leaves, create an even cover that helps retain moisture and block weeds. Match your mulch material to your plants, climate, and budget. Apply it after watering, leaving space around stems and trunks to prevent rot.
For effective weed suppression, follow these steps:
- Spread two to three inches of organic mulch, such as bark, straw, or compost.
- Use lighter straw around vegetable beds; choose bark for paths and established shrubs.
- Check the layer every few weeks, adding mulch where wind or rain has thinned it.
- Pull existing weeds before covering the soil, so they don’t push through.
As organic mulch breaks down, it improves soil. Refresh it seasonally, but avoid piling it too deeply, which can limit airflow and water penetration.
Know When and How to Fertilize Garden Plants
When should you fertilize garden plants? Follow each plant’s needs, growth stage, and your soil’s condition. For sound fertilizer timing, check seed packets or plant labels, since heavy feeding at the wrong time can harm growth.
Many vegetables benefit from nutrients at planting and again during active growth, while some perennials need only a light spring feeding.
Start by testing your soil to understand its soil nutrient balance. A test can reveal deficiencies and help you avoid adding nutrients your garden doesn’t need.
Choose a fertilizer suited to your plants and follow the label’s directions; more isn’t better. Too much can burn roots, weaken plants, or wash into waterways.
Apply granular fertilizer evenly around plants, keeping it off stems and leaves, then water it in if the label recommends. For liquid products, measure carefully and apply to moist soil.
Keep notes on what you use and when, so you can adjust your approach next season.
Prune Plants and Harvest Produce Regularly
Prune your plants regularly to encourage healthy growth, and remove any dead or diseased stems. When your produce reaches peak ripeness, harvest it for the best flavor. With regular care, your garden will stay productive.
Prune for Healthy Growth
Regular pruning and harvesting keep your garden productive and healthy. When you trim thoughtfully, you guide plants toward stronger growth and better airflow. These pruning benefits can mean more flowers, larger fruits, and easier harvesting.
Use clean, sharp shears, and consider pruning timing for each plant. Many flowering crops need trimming after blooms, while vegetables often benefit from regular picking.
- Pinch back herbs like basil to encourage bushy growth and prevent early flowering.
- Remove select stems from crowded tomatoes so sunlight reaches developing fruit.
- Cut back sprawling vines when they block paths or shade neighboring plants.
- Harvest ripe produce promptly; leaving it on the plant can slow new flowers and fruit.
Check plant-specific needs before cutting, since some crops produce on older stems. Make small, deliberate cuts, then observe how your plants respond over the next few weeks.
Remove Dead or Diseased Growth
Remove dead or diseased growth promptly to protect healthy plants and improve airflow. Check your garden often, looking for wilted leaves, broken stems, dark spots, or unusual discoloration.
Use clean, sharp pruners to cut affected parts back to healthy tissue, and disinfect the blades between plants to limit the spread of disease. Don’t leave infected clippings near your garden; bag them and dispose of them according to local guidance.
For dead growth, trim carefully without damaging healthy stems or nearby buds. If a plant shows widespread symptoms, identify the cause before treating it, and remove severely affected plants when necessary.
Regular checks help you catch problems early, reduce hiding places for pests, and keep plants healthier. Wear gloves when handling suspicious material, and wash your hands and tools afterward.
Harvest Produce at Peak Ripeness
Harvesting at the right time brings out the best flavor and encourages many plants to keep producing. Check your crops often, since harvest timing varies by variety and weather. Picking at peak ripeness gives you tender, flavorful produce and helps prevent overripening or waste.
- Tomatoes: Pick them when they’re fully colored and slightly soft; let firm fruit ripen indoors.
- Cucumbers: Harvest while they’re firm and young, before seeds grow large or skins turn bitter.
- Beans: Snap pods when they’re crisp and slender, and keep picking to encourage more.
- Leafy greens: Take outer leaves regularly, leaving the center to continue growing.
Use clean scissors or garden shears to avoid damaging stems. Handle ripe produce gently, and refrigerate crops that need cool storage. A quick daily walk through your garden helps you spot ready harvests and enjoy them at their freshest.
Spot Garden Pests and Problems Early
A quick daily look around your garden can reveal pests and plant problems before they spread. Check leaf tops and undersides, stems, and new growth.
When you spot garden pests early, you can often remove them by hand or protect nearby plants before damage grows. Early problem detection also helps you catch watering, nutrient, or disease issues while simple fixes still work.
| Sign | Possible cause | What you can do |
|---|---|---|
| Chewed leaves | Caterpillars or beetles | Pick pests off |
| Sticky residue | Aphids | Rinse leaves with water |
| Yellowing foliage | Overwatering | Check soil moisture |
| White powder | Powdery mildew | Improve airflow |
| Wilting stems | Dry soil or root stress | Inspect soil and roots |
Look closely after rain and during warm, dry spells, when problems can change quickly. Note unusual signs and check again the next day.
If damage spreads, isolate affected plants and choose a targeted treatment that protects helpful insects. Keep a simple garden log so you can spot recurring patterns and respond sooner next time.
Frequently Asked Questions
How Can I Attract Pollinators to My Garden?
Attract pollinators by planting native plants that bloom in different seasons, giving bees, butterflies, and hummingbirds a steady food source. Create pollinator habitats with sunny, sheltered spots, shallow water, and bare soil or nesting materials.
Choose flowers in varied shapes and colors, and plant them in clusters so pollinators can find them easily. Skip pesticides, especially while plants bloom, and let some stems and leaves remain through winter for shelter.
What Tools Are Essential for Beginner Gardeners?
Your beginner garden needs a sturdy trowel, hand pruners, gloves, a watering can or hose, and a digging fork—your practical toolkit for getting started. Add a hoe for clearing weeds and a measuring tape for spacing plants.
For seed starting, use trays, labels, and a spray bottle. A soil thermometer and simple test kit help you monitor soil health.
Choose durable tools that fit your hands, and clean them after each use.
How Can I Garden Successfully in Containers?
You can garden successfully in containers by choosing pots with drainage holes and matching each plant to a suitable size. Use a quality potting mix to support soil health, and refresh it between growing seasons.
Plan your container design around sunlight, airflow, and watering needs; group plants with similar requirements together. Water when the top layer feels dry, feed regularly, and check for pests.
Remove faded flowers and harvest often to encourage healthy, ongoing growth.
What Are Effective Ways to Reduce Garden Waste?
You can shrink your garden’s waste stream before it snowballs. Start reducing yard waste by choosing native plants, avoiding unnecessary packaging, and reusing pots, stakes, and plant labels.
Leave healthy grass clippings on your lawn, and shred fallen leaves for mulch. For composting basics, combine fruit and vegetable scraps with dry leaves or cardboard, keep the pile lightly moist, and turn it regularly. Skip meat, dairy, and diseased plants to keep your compost healthy.
How Can I Protect My Garden From Strong Winds?
Protect your garden from strong winds by installing a sturdy fence or planting a layered windbreak design with shrubs and trees. Leave some gaps so air filters through rather than creating damaging turbulence.
Stake young plants, secure trellises, and anchor containers before storms arrive. Choose wind tolerant crops, such as kale or beans, and place taller plants where they’ll shelter more delicate ones.
Check supports regularly, especially after severe weather, and repair loose sections promptly.
Conclusion
A great garden grows from steady, thoughtful care—not perfection. Give plants the right light, space, soil, and timing, then protect them with mulch, sensible feeding, and regular checks.
Prune and harvest often, and address problems before they spread. Each small task helps your garden thrive, season after season.
Think of your garden as a living orchestra: when you meet each plant’s needs, every part can play its role. Start with what you have, keep learning, and enjoy the harvest you’ve nurtured yourself. These essential tips can help you grow a great garden.