5 Essential Steps to Prepare Ground for Planting Vegetables
Getting a vegetable garden started can feel overwhelming when you’re unsure whether your soil is ready. You’re not alone—many gardeners struggle to know where to begin. These essential steps to prepare ground for planting vegetables can help you create a healthier foundation for your crops.
To prepare ground for planting vegetables, first choose a sunny, well-drained spot that gets six to eight hours of direct light daily. Clear weeds, stones, and old plants, composting healthy waste and discarding diseased material. Test your soil’s pH, nutrients, texture, and drainage before deciding what it needs. Add finished compost or targeted amendments according to your test results. Finally, loosen moist soil 8 to 12 inches deep and shape accessible beds. These steps set you up for stronger, healthier crops.
Key Takeaways
- Choose a sunny, well-drained spot that gets six to eight hours of direct sunlight daily.
- Remove weeds, stones, debris, and old plants; compost healthy waste and discard diseased material.
- Test soil pH, nutrients, texture, and drainage to guide crop choices and soil improvements.
- Add finished compost and only the amendments or fertilizer recommended by your soil test.
- Loosen moist soil 8 to 12 inches deep, then shape accessible beds with paths to prevent compaction.
Choose a Sunny Spot for Your Vegetable Garden

Start by choosing a spot that gets at least six to eight hours of direct sunlight each day. Most vegetables need steady light to grow strong and produce well, so observe your yard throughout the day before settling on a sunny location. Check whether trees, fences, buildings, or other structures cast shadows over the area, especially during morning and afternoon.
Track the sun exposure duration across several days, since seasonal changes can shift shade patterns. Fruiting crops such as tomatoes, peppers, and cucumbers generally thrive in full sun, while leafy greens can tolerate some afternoon shade. Match your garden spot to the crops you plan to grow.
Also consider how nearby surfaces affect heat and access to water. A location near a hose can simplify watering, but avoid places where runoff collects after rain. Choose ground with good drainage capacity; soggy soil can damage roots. You’ll improve growing conditions further by preparing nutrient rich soil in your chosen spot before planting.
Clear Weeds, Debris, and Old Plants

Once you’ve chosen a sunny, well-drained spot, clear it of weeds, stones, sticks, and other debris. Removing unwanted growth gives your vegetables room to thrive and helps you start with a tidy, workable bed.
Clear your sunny, well-drained garden spot of weeds and debris to give vegetables room to thrive.
Pull weeds by the roots, especially before they flower or scatter seeds. For stubborn patches, loosen the soil around roots with a hand fork, then lift them out. Your weeding strategies should target invasive plants carefully so you don’t spread their roots or seeds.
As you work, gather old plants and other garden waste. Healthy, disease-free material can go into your compost pile; discard anything diseased or pest-ridden.
Try these simple debris removal habits:
- Wear gloves to protect your hands from thorns and splinters.
- Use a rake to collect leaves and small twigs.
- Lift stones and larger branches by hand.
- Bag weeds that carry seeds.
- Keep a bucket nearby for quick cleanup.
Finish by removing plant labels, ties, and other clutter. A clean bed makes planting easier and more enjoyable.
Test Your Soil and Check Its Drainage

Before you plant, test your soil to learn its pH and nutrient levels, then check how well it drains. A home test kit can give you a quick reading, but a lab analysis offers more detail about nutrient availability and soil conditions.
Follow the instructions carefully, and note the results so you can choose vegetables suited to your growing site.
Next, assess soil texture by rubbing a moist handful between your fingers. Sandy soil feels gritty, clay soil feels sticky, and loam feels crumbly.
Texture affects how quickly water moves through the ground and how much air reaches roots.
For a drainage test, dig a hole about 12 inches deep and wide. Fill it with water, let it drain, then refill it. Check the hole after several hours.
Water that remains may signal slow drainage; rapid emptying may indicate dry conditions. Consider each crop’s root depth when judging whether the soil provides enough space and moisture.
Record what you observe before planning your beds.
Add Compost and Soil Amendments
Use your soil test results to decide whether your garden needs compost or other amendments. Choose products that address specific deficiencies rather than guessing; too much of a nutrient can harm plants.
To add compost, use finished, crumbly material that smells earthy, not sour. Spread it evenly over the garden area, following your test’s recommendations for quantity.
Consider these options when choosing soil amendments:
- Add aged manure only when it’s fully composted and safe for vegetables.
- Use lime or sulfur only if your test recommends adjusting pH.
- Choose a targeted fertilizer when you need to correct a nutrient shortage.
- Mix in leaf mold or compost to improve organic matter.
- Check product labels so you don’t upset nutrient balance.
Apply amendments according to package directions, and keep records of what you use. Don’t add several products without checking how their nutrients overlap.
Plan mulch timing, too: wait until after planting and watering so mulch won’t interfere with seed germination or early growth.
Loosen the Soil and Shape Your Garden Beds
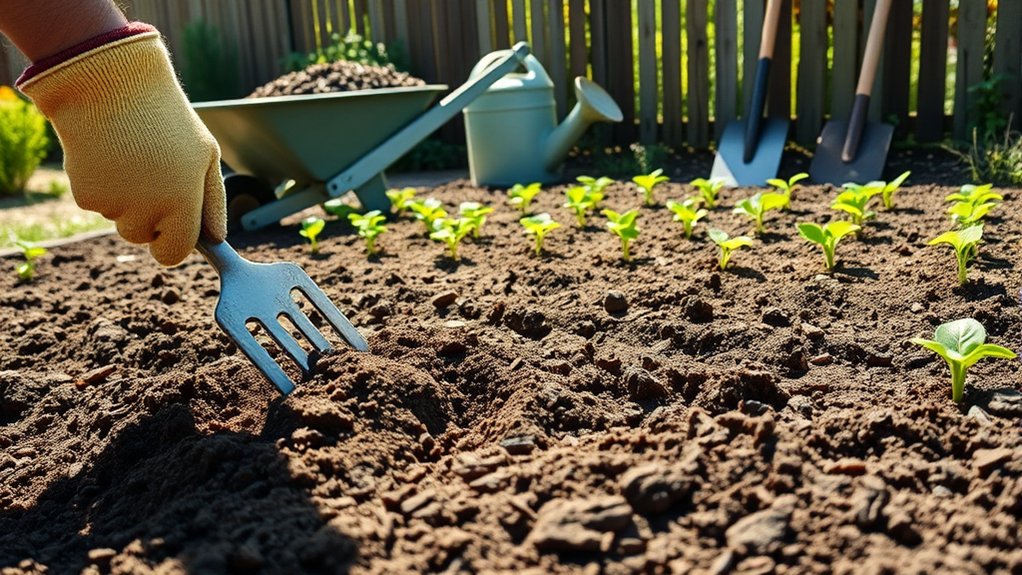
With amendments in place, loosen the soil when it’s moist but not wet; working soggy ground can compact it and damage its structure. Use a garden fork or broadfork to lift and fracture the earth, allowing air and water to reach plant roots.
Work only as deep as needed, usually about 8 to 12 inches, and avoid turning the soil excessively. If you encounter clumps, break them gently; leave small pieces to preserve soil structure.
Next, shape beds to suit your space and crops. Raised beds can improve drainage and make planting and harvesting easier, while level, in-ground beds work well in many gardens.
Keep beds narrow enough that you can reach the center from either side without stepping on the soil. Mark straight or curved edges with string, then rake the surface smooth.
Create shallow paths between beds so you can move around without compacting growing areas. A well-prepared bed gives vegetables room to establish healthy roots and makes routine care simpler.
Frequently Asked Questions
When Is the Best Time of Year to Prepare Ground for Planting Vegetables?
The best time to prepare ground is a few weeks before you plan to plant, usually in early spring for warm-season vegetables. For cool-season crops, you can prepare in late summer or early fall.
Choose your best planting window based on local frost dates and weather readiness: work the soil when it’s thawed, reasonably dry, and no longer clumping or sticking to your tools. Preparing ahead gives amendments time to settle.
How Long Should I Wait After Preparing the Soil Before Planting?
You can usually plant as soon as your soil is workable, evenly moist, and amended materials are mixed in; you don’t need a fixed wait. Your wait period after soil prep depends on what you added: compost needs no delay, but fresh manure may require several months or a full season.
Check timing for soil readiness by squeezing a handful: it should crumble, not form a sticky clump. Follow seed packet directions for planting depth and temperature.
Should I Use Raised Beds or Plant Directly in the Ground?
Choose raised beds if your ground drains poorly, contains rocks, or suffers from soil compaction; plant directly in the ground if your soil is healthy and workable. Think of a raised bed as a garden’s fresh start: one gardener can fill it with loose soil and avoid years of trampling. You’ll also find raised beds easier to reach, though they cost more and need watering more often. Either option can grow a productive vegetable garden.
How Can I Protect Newly Prepared Garden Soil From Erosion?
Protect newly prepared garden soil with a temporary cover, such as straw, shredded leaves, or a breathable erosion-control fabric. Spread mulch evenly, but keep it loose so water can soak through.
On slopes, lay materials across the incline and secure them with stakes. Plant a cover crop if the bed won’t be used soon.
Avoid walking on wet beds; you’ll reduce soil compaction and help preserve the soil’s structure.
Which Vegetables Are Easiest to Grow for Beginners?
For an easy first harvest, choose forgiving vegetables like radishes, lettuce, spinach, bush beans, and zucchini. These easy starter crops grow quickly or produce generously, so you’ll enjoy early wins while learning.
Pick varieties suited to your climate, give plants enough sunlight, and water consistently. You can also use soil friendly practices, such as adding compost and mulching, to support healthy growth.
Start with a few favorites, and you’ll soon find gardening less challenging.
Conclusion
By choosing a sunny spot, clearing debris, checking your soil, adding compost, and shaping your beds, you’ll give vegetables a strong start. Keep the process simple: healthy soil supports better growth and makes routine care easier.
For perspective, a single teaspoon of healthy soil can contain more microorganisms than there are people on Earth. As you prepare your garden, remember that small improvements add up. These 5 essential steps to prepare ground for planting vegetables will help your plants thrive and reward your effort with a more productive growing season.