How to Plan Garden Layout in 10 Essential Steps
Planning a garden layout can feel overwhelming when you’re trying to balance sunlight, soil, space, and budget. You’re not alone—many gardeners struggle to turn their ideas into a practical plan. These garden layout ideas can help you make the most of your space and choose a design that works for you.
To plan a garden layout in 10 essential steps, set your top goals, rank priorities, map your yard, and track sun, shade, and wind. Check soil and drainage, then choose a layout that suits your space and needs. Add accessible paths, set a firm budget, and select climate-appropriate plants for each spot. Account for mature plant sizes and leave room to work. Sketch, review, and refine the plan before buying; the steps below will help you make it practical.
Key Takeaways
- Define your garden’s main purpose, rank your top three goals, and account for your time, budget, and experience.
- Sketch the yard with measurements, boundaries, structures, trees, paths, gates, and utility access.
- Track sun, shade, wind, slopes, and drainage to place beds and choose suitable plants.
- Arrange beds, paths, and access points for easy movement, maintenance, and room for plants to grow.
- Set a firm budget, compare material sources, choose climate-appropriate plants, and review the plan before buying.
Set Your Garden Goals and Priorities

Before you choose plants or sketch beds, decide what you want your garden to do. When you define goals, you’ll make choices that fit your needs instead of chasing every appealing idea. You might want fresh vegetables, a quiet place to relax, colorful flowers, or a safe play area for children. Choose the main purpose first, then note any secondary uses you’d like to include.
Next, set priorities by considering your time, budget, and experience. A productive vegetable garden may need regular care, while a low-maintenance space may suit a busy schedule better. Decide how much effort you can sustain, not just how much you can manage this season. Think about who will use the garden and what would make it enjoyable or useful for them.
Write down your top three goals and rank them. This simple list helps you make trade-offs later, keeps your plans focused, and gives you a clear standard for judging whether your finished garden works.
Map Your Yard for a Garden Layout
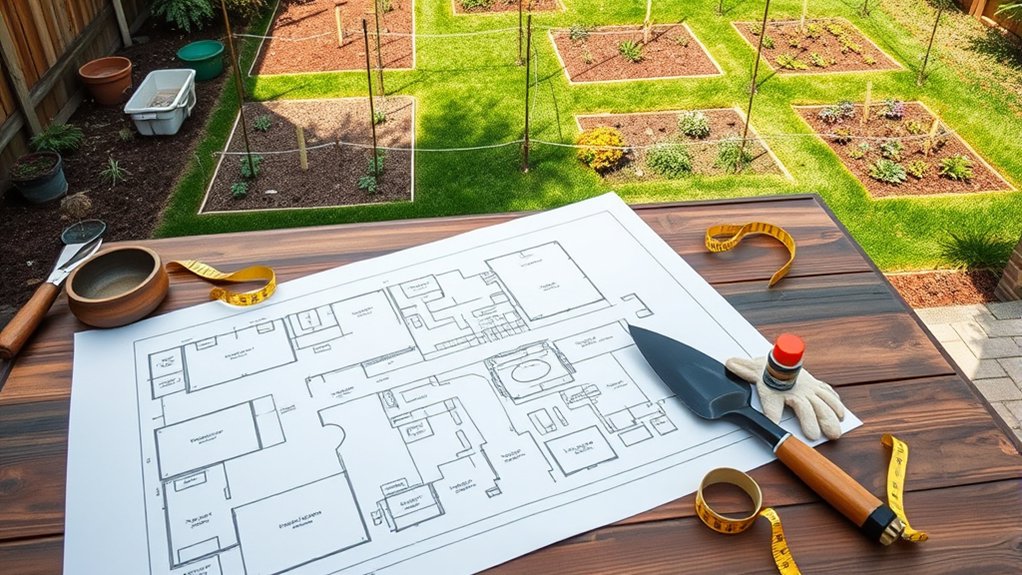
Once you’ve set your priorities, map your yard to see where each garden feature can fit. Start with a simple sketch, or print an overhead image of your property. Mark the house, fences, paths, gates, and existing trees or structures.
A simple yard map helps you see where garden features fit before you start digging.
Keep measurements practical: pace distances or use a tape measure, then note approximate dimensions. Your map doesn’t need to look perfect; it just needs to help you compare options.
Use the sketch to test layout patterns and spot conflicts before you dig. Try placing key features in different positions:
- Set beds near convenient paths for easy access.
- Leave clear routes for carrying tools and harvests.
- Mark space for seating, storage, or compost.
- Add water features where they’ll fit without blocking movement.
- Note existing obstacles you’ll need to work around.
Label each area with its purpose, and revise the drawing as your plans change. A flexible map gives you a useful guide without locking you into one design.
Keep a copy handy when you shop, measure materials, or begin laying out beds.
Track Sunlight, Shade, and Wind
Track sunlight, shade, and wind across your yard before choosing where to place plants and garden features. Visit at different times of day, noting where direct light falls and how long it lasts.
Repeat your sunlight tracking on several days, since clouds and seasonal changes can shift patterns. Mark sunny, partly shaded, and deeply shaded areas on your yard map.
This record helps you match each plant’s light needs to a suitable spot and keeps tall features from casting unwanted shade.
Pay attention to wind direction and strength, too. Notice where gusts funnel between buildings or sweep across open areas, and identify sheltered corners.
You can use fences, hedges, or trellises for wind shading, but leave enough airflow to reduce stagnant, damp conditions. Consider how these barriers might affect nearby beds as they grow.
Add arrows and notes to your map so you can compare exposure across the yard. With these observations, you’ll place seating, paths, and plants where they’ll feel comfortable and thrive.
Check Your Soil and Drainage
With sunlight and wind mapped, check your soil and drainage to see which plants your yard can support. Start with a handful of damp soil. Its texture and feel reveal clues about soil structure, but a few simple tests can give you a clearer picture.
- Squeeze a moist handful: sandy soil crumbles; clay holds its shape.
- Rub soil between your fingers to notice whether it feels gritty, silky, or sticky.
- Check pH with a home kit to learn whether your soil is acidic or alkaline.
- Dig a small hole, fill it with water, and watch how quickly it empties.
- Look for puddles after rain; standing water can signal poor drainage.
Your drainage rate affects roots: water that disappears too quickly can leave plants thirsty, while slow drainage may cause rot. Mix in compost to improve many soils, but retest before adding amendments. Note any compacted or soggy spots so you can match future plant choices to their conditions. Don’t assume every bed has identical soil.
Choose a Garden Layout for Your Needs
How you arrange your garden depends on what you want to grow and how you’ll use the space. Before you choose a layout, consider how much time you can spend maintaining it, who’ll use the garden, and what you want to enjoy there. A space for relaxing may need room for seating, while a productive garden should make growing food convenient. If you want both, look for a design that balances practical and comfortable uses.
Next, match the overall style to your preferences and surroundings. You might prefer a formal, symmetrical look, a relaxed cottage feel, or a naturalistic design that blends with the landscape. To narrow your options, evaluate palettes of colors, materials, and plant styles that appeal to you. Think about how each choice will look through the seasons and whether it suits your home.
Set priorities, then choose a concept that feels manageable. You can adapt it as your needs change; you don’t have to follow a rigid plan or ignore other sections of your property.
Lay Out Garden Beds and Growing Zones
Once you’ve chosen a garden style, map out where each bed and growing zone will go. Sketch your yard to scale, noting sunlight, shade, slopes, and existing features.
Plan your garden layout to scale, noting sunlight, shade, slopes, and existing features before placing beds and growing zones.
Place crops according to their needs, and keep taller plants from casting unwanted shade on shorter ones. Consider layout drainage before you settle on bed positions; avoid low spots where water collects, and plan for thirsty plants near a reliable water source.
- Group vegetables with similar sun and watering needs.
- Put herbs you use often near the house.
- Reserve sunny spots for tomatoes, peppers, and other heat lovers.
- Place leafy greens where afternoon shade can protect them.
- Leave enough spacing accessibility for tending, harvesting, and airflow.
Check your sketch against the plants’ mature sizes, not just their seedling dimensions. Give sprawling squash room to spread, and keep trellised crops where they won’t shade neighboring beds.
Mark each zone clearly so you can follow the plan when planting. A little flexibility helps: leave room to adjust as you learn what thrives in your garden. You’ll create a layout that supports healthy growth and makes daily care feel manageable.
Add Paths and Easy Access Points
Add paths between beds so you can reach every plant without stepping on soil or damaging crops. Plan routes that connect the entrance, beds, compost area, and water source. Keep main paths wide enough for a wheelbarrow, while narrower paths can serve smaller spaces. Good paths accessibility lets you move tools and harvest comfortably, even when plants grow full.
Choose a surface that suits your garden’s conditions. Gravel, mulch, stepping stones, or firm turf can all work; consider drainage, traction, and material durability before deciding. Avoid slick surfaces where water collects, and make paths level enough to reduce trips. If you garden in wet weather, use a stable surface that won’t turn muddy.
Add access points at bed ends so you can reach both sides without stretching across plants. Leave turning space where paths meet, and keep routes clear of hoses and overhanging foliage. As your layout takes shape, walk each route and adjust any tight corners or dead ends. A simple, accessible path system makes daily care easier and protects your growing soil.
Set a Budget for Plants and Materials
Set a realistic budget before buying plants and materials so your garden plan fits your finances. Start by listing every cost, including soil, compost, edging, tools, and delivery. Check what you already own, then set a firm spending limit and keep a small reserve for surprises.
Compare material sources before you buy. Local suppliers, reuse centers, and community swaps may offer good value.
- Price materials by quantity, not just by package.
- Ask suppliers about delivery fees and minimum orders.
- Reuse containers, bricks, or timber when they’re safe and suitable.
- Buy durable tools you’ll use often; borrow specialty equipment.
- Track each purchase so you know what remains.
If costs exceed your limit, adjust the project’s scale or phase purchases over time. Keep essential materials in your first round and postpone optional features.
Save receipts and update your figures as prices change. A clear spending plan helps you make deliberate choices without letting small expenses quietly add up. It also leaves room to maintain your garden after installation.
Choose Plants for Your Space and Climate
Choose plants suited to your climate so they can thrive with less effort. Then match each plant to the sunlight your garden receives. Check mature sizes, too, to make sure your plants have room to grow.
Assess Your Climate
Before choosing plants, learn what your climate can support. Check your region’s hardiness zone, but don’t treat it as a guarantee; climate variability can bring unusual frosts, heat waves, or rainfall. Review local records and your yard’s microclimates overview to understand how conditions may differ from nearby gardens. Note:
- Your average first and last frost dates
- Typical summer highs and winter lows
- Annual rainfall and seasonal dry spells
- Strong winds, storms, or snow exposure
- Soil drainage after heavy rain
Use these details to shortlist plants suited to your area, then confirm their labels and local guidance. Ask nearby gardeners what thrives through changing seasons. If your weather shifts unpredictably, choose resilient varieties and avoid relying on one delicate favorite. A climate-aware plan helps you spend less time replacing plants and more time enjoying your garden.
Match Plants to Sunlight
Next, map how sunlight moves across your garden, since even nearby spots can differ in exposure. Observe each area in the morning, midday, and afternoon, noting direct sun, filtered light, and shade. Check again during different seasons, because trees and buildings can change the pattern.
Then compare each spot with plant labels or reliable growing guides. Match plants’ sunlight requirements to the hours and intensity of light your garden actually receives. Choose sun-loving crops and flowers for bright beds, and reserve dimmer corners for plants with strong shade tolerance.
If a location gets only a brief burst of sun, select species that thrive in partial shade rather than hoping they’ll adapt. Your climate matters, too: favor varieties suited to your region’s heat and seasonal conditions, so they can flourish in the light available.
Consider Mature Plant Size
How large will each plant grow at maturity? Check the plant tag or a reliable growing guide before you buy. A seedling may look small today, but its mature plant size determines how much room it’ll need, how much shade it’ll cast, and whether it might crowd nearby plants. Plan for its full spread, not just its height, and consider roots that may compete for water.
Use these spacing considerations to shape your layout:
- Give shrubs and trees room to reach their natural width.
- Leave paths wide enough for easy access and garden chores.
- Keep tall plants from blocking sunlight from shorter neighbors.
- Place spreading vines where you can guide or trim them.
- Group plants with similar growth habits and climate needs.
If your space is limited, choose compact varieties or grow suitable plants in containers. Proper spacing helps each plant thrive and makes maintenance easier.
Sketch and Refine Your Garden Plan
Start by mapping your garden space. Note its dimensions, sunlight, and any existing features. Then place paths and beds where they’ll be easy to access and help plants thrive. As you choose your plants, adjust your sketch to make sure everything fits.
Map Your Garden Space
A simple sketch turns your garden measurements into a workable plan. Start with your space assessment: note the yard’s boundaries, existing features, and areas that get sun or shade. Then use your planning goals to decide what your drawing needs to show. You don’t need artistic skill; clear labels and accurate proportions matter more.
- Outline the garden’s edges and mark its dimensions.
- Add trees, structures, utilities, and other fixed features.
- Track sunny and shaded spots at different times.
- Note slopes, wet areas, and exposed corners.
- Label measurements so you can check the plan later.
Review your map from indoors and outdoors, and correct anything you’ve missed. Keep a clean copy for future changes, and make a few versions if you’re weighing different ideas. A useful map gives you a reliable base for decisions without locking you into one design.
Place Paths and Beds
With your map in hand, sketch paths and garden beds to see how they’ll fit together. Draw routes between entrances, seating, and planting areas, leaving enough room for comfortable movement. Place beds where sunlight and water access suit your plants. Choose a path material that fits your budget and garden style, then mark bed edging to define each space.
| Feature | Placement | Planning note |
|---|---|---|
| Main path | Entry to garden | Keep it direct |
| Side path | Between beds | Allow easy access |
| Vegetable bed | Sunny area | Group crops nearby |
Use simple shapes to represent paths and beds, and label each clearly. Check that paths connect key destinations without cutting through planting space. Keep bed sizes manageable so you can reach plants from the edges. Mark these elements on your map to show their relationship to existing features.
Refine Your Sketch
Now, review your sketch as a whole. Check whether paths connect naturally, beds fit their spaces, and each area supports how you’ll use your garden. To refine sketch details, imagine moving through the plan during everyday tasks, from watering seedlings to carrying harvests indoors. Then adjust layout choices that feel awkward or crowded.
- Check that paths are wide enough for your tools and wheelbarrow.
- Make sure plants won’t block doors, windows, or walkways.
- Confirm sunny and shady spots suit your chosen plants.
- Leave room for plants to grow without crowding each other.
- Mark water access and storage where you can reach them easily.
Ask someone to review your drawing. They may notice a pinch point you’ve missed. Update the sketch, then pause before buying materials. A clear, workable plan will make building and planting easier and help you avoid costly changes later.
Frequently Asked Questions
When Is the Best Time of Year to Start a Garden?
Lo, you can start your garden in spring, once your soil warms and frost risk passes. Your best date depends on your local climate and what you’ll grow.
For cool-season crops, plant earlier; heat-loving vegetables need warmer weather. Check your area’s frost dates, then use seed timing instructions on each packet.
You can also start some seeds indoors weeks ahead. Good planning seasons vary by region, so watch conditions rather than relying on the calendar alone.
How Often Should I Water a Newly Planted Garden?
Water your newly planted garden whenever the top inch of soil feels dry—often daily during the first week, especially in hot, windy weather. After plants establish, you can usually water less often, but give them a deeper soak.
Check soil moisture with your finger rather than following a rigid watering cadence, since rainfall, temperature, soil type, and plant needs all affect how quickly your garden dries. Water near the roots to reduce waste.
What Tools Are Essential for Maintaining a Garden?
Your essential tools include a hand trowel, pruning shears, garden gloves, a watering can or hose, and a sturdy hoe. These cover maintenance basics such as planting, trimming, weeding, and watering.
Add a rake and wheelbarrow if you manage larger beds. Keep tools clean and sharp to work safely and efficiently.
For pest prevention, use a hand lens and row covers. Choose sustainable methods, like composting and collecting rainwater, to support healthy soil and conserve resources.
How Can I Keep Pests Out of My Garden Naturally?
You can keep pests out naturally by treating your garden like a balanced neighborhood: when aphids arrive, ladybugs can act like tiny security guards. Plant flowers such as dill and alyssum to attract beneficial insects, and grow pest-repelling herbs like basil or mint near vulnerable crops.
Use natural pest repellents, including neem oil or soapy water, only as needed. Rotate crops, remove infested leaves, and cover seedlings with lightweight row fabric. You’ll protect plants without relying on harsh chemicals.
How Do I Prepare My Garden for Winter?
Prepare your garden for winter by clearing diseased plants, harvesting remaining crops, and cutting back perennials that have finished growing. Add compost to replenish nutrients, then use mulching strategies to insulate beds and suppress weeds.
For winter soil protection, cover bare ground with leaves, straw, or a cover crop to prevent erosion and nutrient loss. Drain hoses, clean tools, and protect tender plants with frost cloth so you’re ready for spring.
Conclusion
A garden plan won’t stop weeds from appearing exactly where you don’t want them, but it can keep your tomatoes out of the shade and your hose within reach. Set your goals, study your yard, check the soil, and choose a layout, plants, and budget that fit your space.
Then sketch, refine, and get growing. Your first draft doesn’t have to be perfect; unlike weeds, good ideas improve when you give them room. With these 10 essential steps to plan a garden layout, you’ll be ready to get started.