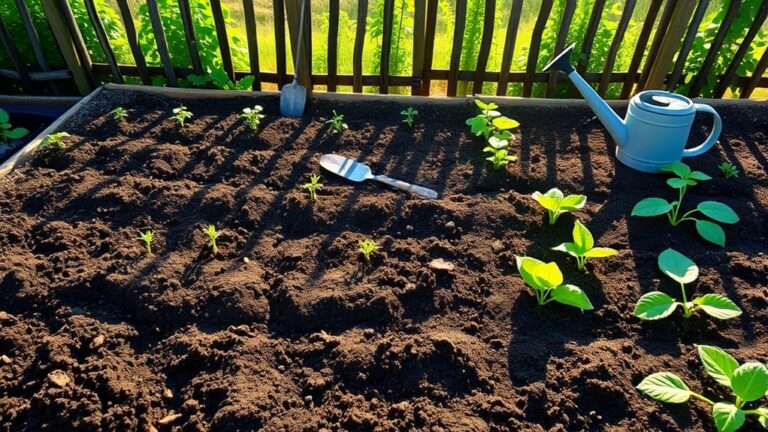
7 Easy Steps to Prepare Soil for Planting Flowers
Getting flowers to thrive can be frustrating when the soil is too compact, drains poorly, or has the wrong pH. You’re not alone—many gardeners struggle to prepare a flower bed that gives plants a healthy start. These seven easy steps to prepare soil for planting flowers can help you create the right foundation.
First, choose a sunny spot with at least six hours of direct light and good hose access. Next, test your soil’s pH and texture, then fix drainage issues without working wet soil.
Spread 2–3 inches of compost and mix it into the top 6–8 inches. Adjust pH for your chosen flowers, loosen soil for roots, then rake the bed level and water gently.
Keep going for practical tips on each step.
Key Takeaways
- Choose a sunny, accessible site with at least six hours of direct sunlight and no standing water.
- Test soil pH and texture using samples from several spots, then match flowers to the results.
- Remove weeds and debris, then loosen the soil to the depth the flowers’ roots need.
- Spread 2–3 inches of compost and mix it into the top 6–8 inches of soil.
- Rake the bed level, water gently to settle it, then smooth any dips or bumps before planting.
Choose a Sunny Spot for Your Flower Bed

Before you prepare the soil, choose a spot that gets at least six hours of direct sunlight a day. Most flowering plants need plenty of light to produce healthy growth and abundant blooms. Check the area at different times, since nearby trees, fences, or buildings may cast shadows that shift throughout the day.
Think about flower bed placement before you start digging. Pick a sunny spot that’s easy to reach with a hose and close enough for regular care. Avoid locations where water collects after rain or where foot traffic could damage plants.
If you’re planting flowers with different light needs, choose a site that suits most of them, then group plants according to their preferences.
Watch the spot for a full day if you’re unsure how much sun it receives. Note when direct light reaches the ground and when shade covers it. Once you’ve chosen a suitable location, mark the bed’s outline. You’ll be ready to prepare the soil in the right place.
Test Your Soil’s pH and Texture

Next, test your soil’s pH and texture to learn what your flowers will be growing in. These simple checks reveal whether your soil can support healthy roots and help you choose suitable flowers or amendments.
Test your soil’s pH and texture to understand what it can support and choose the right flowers or amendments.
- Check pH. Collect a soil sample from several spots in the bed, mix it, and use a home test kit. Most flowers prefer slightly acidic to neutral soil, but check the needs of your chosen varieties. If you want a precise reading, send a sample to a local extension lab.
- Feel the texture. Moisten a small handful and rub it between your fingers. Sandy soil feels gritty, clay soil feels sticky, and loam feels crumbly. This texture analysis gives you a quick sense of the soil’s composition.
- Record what you find. Note the pH and texture so you can make informed decisions as you prepare the bed. These observations offer a useful snapshot of soil health and help you plan for your flowers’ needs.
Fix Drainage Problems in Heavy Soil

If water lingers after rain, heavy soil may be draining too slowly for healthy flower roots. Check your bed after a storm: puddles, sticky soil, and a sour smell can signal trouble. Don’t dig or walk on wet ground; that pressure squeezes soil particles together and worsens compaction.
Wait until the soil is moist but crumbly, then loosen it with a garden fork. Push the fork in, rock it gently, and lift without turning the soil over. Repeat across the bed to create channels that help water move downward. This compaction relief gives roots more room to breathe and grow.
For a lasting drainage overhaul, shape the bed slightly higher than the surrounding ground so excess water can run off. If your site stays soggy, consider a raised bed or a shallow drainage channel leading away from flowers. Avoid adding a layer of gravel beneath the bed; it won’t fix poor drainage and may trap water above it.
Add Compost to Prepare Soil for Flowers
Choose quality compost that’s dark, crumbly, and free of unpleasant odors. Mix it evenly into the soil before planting your flowers. This adds valuable nutrients and improves the soil structure.
Choose Quality Compost
Healthy soil gives flowers a strong start, and quality compost can improve its texture and add nutrients. Before you choose a product for your flower bed, check its ingredients and appearance. Good compost should look dark and crumbly, smell earthy, and contain no obvious trash or large, undecomposed scraps. These signs can help you judge compost quality, though labels and sourcing matter, too.
- Check the source: Choose compost made from plant materials or well-managed organic waste. Look for clear information about how it was produced.
- Read the label: Select a product suited to garden use, and avoid compost with added chemicals you don’t want near your flowers.
- Inspect the texture: Pick a fine, even product that’s easy to handle and free of unpleasant odors.
Quality compost gives you a reliable starting point for preparing soil.
Mix Compost Into Soil
Once you’ve chosen quality compost, work it into the soil so its organic matter can improve the bed’s texture and nutrient content. Spread a layer about two to three inches thick over the planting area.
Use a garden fork or shovel to mix it into the top six to eight inches of soil, breaking up clumps as you go. This depth gives flower roots room to grow while helping compost blend evenly.
If your soil is heavy clay, compost can loosen it and improve drainage; in sandy soil, it helps retain moisture. Don’t leave thick pockets of compost, which can create uneven conditions for roots.
After mixing, rake the bed level and remove stones or weeds. Your improved soil texture will support healthy growth and help flowers establish.
Adjust Soil pH for Your Chosen Flowers
Test your soil’s pH with a home kit or lab test, then check the preferred range for your chosen flowers. If the pH doesn’t match, adjust it with the right amendment.
Test Your Soil’s pH
Before adjusting your soil, find out whether it’s acidic, neutral, or alkaline. Soil pH testing gives you a reliable starting point and helps you understand whether pH may affect nutrient balance. Don’t guess from plant growth alone; several conditions can cause similar symptoms.
- Collect soil from several spots in the flower bed, taking samples from the root zone. Remove stones, mulch, and debris, then mix the soil in a clean container.
- Use a home test kit or digital meter, following its directions carefully. For a more precise reading, send a sample to your local extension service or soil laboratory.
- Record the result and the date. If readings vary across the bed, test those areas separately before making changes.
A clear baseline helps you plan careful adjustments without adding amendments unnecessarily. Keep the results handy for later decisions.
Match pH to Flowers
Use your soil test results to choose a pH target that suits the flowers you plan to grow. Check seed packets or reliable gardening guides for each flower’s preferred range; many thrive in slightly acidic soil, while others need different conditions.
If you’re planting several kinds, group flowers with similar needs so you can manage the soil pH more easily. When your results fall outside the target range, adjust gradually rather than making a large correction at once.
Add garden lime to raise pH, or use elemental sulfur to lower it, following product directions and considering your soil type. Retest after amendments have had time to work.
Different testing methods may produce slightly different readings, so use the same method each time to track changes and avoid overcorrecting your flower bed.
Loosen Soil to Make Room for Roots
Once the soil is clear of weeds and debris, loosen it to give flower roots room to spread. Work when the ground is slightly moist, not soggy or hard; soil in the right condition breaks apart without clumping or turning to dust.
Loosen soil across the planting area, reaching the depth your flowers’ roots will need.
Loosen the full planting area to the depth your flowers need, giving roots room to spread.
- Use a garden fork or spade to lift and turn the soil. Push the tool in, then gently rock it back to open compacted layers.
- Break large clods with your hands or the tool, but don’t pulverize the soil. A crumbly texture lets roots move while preserving useful structure.
- Remove stones and any stubborn roots you uncover. Check for dense patches, then loosen them so each plant has enough root space.
Take care not to dig too deeply near established plants or buried utilities. If the soil resists your tool, work gradually rather than forcing it.
Stop once the bed feels open and workable.
Level the Bed and Water Before Planting
Rake the loosened soil until the bed is even, then water it lightly to help the soil settle before planting. To level the bed, pull a rake across the surface and fill low spots with soil from high areas. Break up clumps so your flowers won’t sit on uneven ground or collect water in dips.
| Check | What to do | Why it helps |
|---|---|---|
| High spots | Rake soil outward | Creates an even surface |
| Low spots | Add nearby soil | Prevents pooling |
| Dry soil | Sprinkle gently | Settles soil evenly |
When you water before planting, use a gentle spray to avoid washing soil away. Aim for moist, not soggy, soil; standing water can limit air around roots. Let the bed rest briefly, then check its surface again. If watering exposes dips or bumps, rake them smooth.
Your prepared bed should feel settled and look even, giving seedlings a steady start. Don’t compact the soil by walking on it; reach across the bed or use a board to distribute your weight.
Frequently Asked Questions
When Is the Best Time of Year to Prepare a Flower Bed?
The best time to prepare a flower bed is usually fall or early spring, when the soil is workable and not waterlogged. For summer blooms, start several weeks before planting so amendments can settle and soil can warm.
Preparing soil for summer beds in fall gives compost time to improve its structure over winter. With timely seasonal preparation, you’ll avoid rushing, protect soil health, and give your flowers a strong start when planting season arrives.
How Deep Should Flower Seeds or Seedlings Be Planted?
Plant flower seeds as lightly as a feather, usually at a depth two to three times their width; tiny seeds often need only a surface dusting. Check the packet, since each variety has its own preferred seed depth.
For seedlings, dig a hole as deep as the root ball and set the plant at the same soil level it grew in before. Careful seedling placement helps roots settle without burying stems or exposing them.
How Far Apart Should Flowers Be Spaced?
Space flowers according to their mature width: plant small varieties about 6–12 inches apart, medium ones 12–18 inches apart, and large varieties 18–36 inches apart. Check each seed packet or plant label for specific spacing guidelines, since growth habits differ.
Give spreading flowers extra room, and consider root depth when choosing locations so roots won’t compete. If you’re unsure, start with the recommended distance; crowded plants can restrict airflow and invite disease.
Which Flowers Grow Best in Containers?
Petunias, marigolds, geraniums, and calibrachoa spill color like confetti from pots, while compact zinnias and begonias brighten smaller spaces. Choose blooms that suit your sunlight: petunias love full sun, but begonias prefer shade.
Good container selection gives roots room to grow and ensures drainage holes prevent soggy soil. Mix in soil amendments, such as compost, to nourish your plants. Water when the top inch feels dry, and deadhead faded flowers to encourage fresh blooms.
How Can I Protect Newly Planted Flowers From Pests?
Protect newly planted flowers by checking them daily for chewed leaves, eggs, and pests, then remove offenders by hand or spray them off with water. Add protective mulch around plants to discourage some pests and keep soil moisture steady, but leave space around each stem.
Encourage beneficial insects, such as ladybugs, by planting nectar-rich flowers and avoiding broad-spectrum pesticides. Use row covers for vulnerable seedlings, and choose a targeted treatment only when needed.
Conclusion
Follow these seven steps, and you’ll give your flowers a strong start before they ever reach the soil. Choose a sunny spot, check your soil, improve drainage, add compost, adjust pH, loosen the ground, and finish by leveling and watering the bed.
As you prepare, remember that healthy soil is the stage where your flowers’ colors can shine. With a little care now, you’ll make planting easier and help your garden thrive throughout the growing season. Preparing soil for planting flowers is a simple way to set your garden up for success.