10 Steps to Plan a Flower Bed Perfectly
Planning a flower bed can feel overwhelming when you’re unsure where to start or which flowers will thrive. You’re not alone—many gardeners struggle to balance sunlight, soil, colors, and bloom times. This guide to 10 steps to plan a flower bed perfectly will help you create a beautiful, practical space with confidence.
Choose an accessible spot, check sunlight and drainage, measure and sketch the layout, then improve the soil. Select climate-suited flowers and arrange them by mature height and spacing.
Coordinate colors and bloom times for a long season, and add varied foliage for year-round interest. Plant at the right time, then water, mulch, and maintain your bed.
Keep paths clear and account for seasonal changes. A few practical details can help you get each step right.
Key Takeaways
- Choose an accessible location that complements nearby features, avoids utilities and major roots, and leaves room for paths and maintenance.
- Track sunlight in each bed section over several days, noting direct sun and shade as seasons change.
- Test drainage and soil texture; improve waterlogged soil with compost or a raised bed, and fast-draining soil with organic matter.
- Measure and sketch the bed, then select climate-suited plants with compatible light, soil, colors, and overlapping bloom times.
- Arrange plants by mature height and spacing, layering shorter flowers in front and taller ones behind; include varied foliage for year-round interest.
Choose the Right Spot for Your Flower Bed

Before you choose flowers, decide where the bed will go. Walk around your yard and notice how you use each area. Choose a spot you can reach easily for planting, pruning, and watering, without blocking paths, doors, or views.
Keep the bed clear of underground utilities and avoid placing it where roots from large trees may compete with your plants. Think about landscape aesthetics, too: a bed can frame an entry, soften a fence, or add color beside a patio.
Match its shape and scale to nearby features so it feels intentional rather than crowded. Consider how the location fits your routine and the rest of your yard. A visible bed can welcome guests, while a tucked-away corner may create a quiet retreat.
Leave enough room to move around the planting area and maintain its edges. Choose a site that supports practical care and complements your property. Good placement also helps with pest management by keeping plants away from problem areas and making inspections easier.
Check Sunlight, Shade, and Drainage

Track how many hours of sunlight your flower bed gets each day, and check how quickly water drains through the soil. These details will help you choose plants that thrive in that spot.
Track Sunlight Hours
How much sun does your flower bed receive each day? Track sunlight duration before choosing plants. On a clear day, check the bed every hour from morning through late afternoon. Note when direct sun reaches each area and when shade covers it. Repeat your observations over several days, since clouds, nearby trees, and buildings can change the pattern. A simple sketch or time-stamped photos can help you compare results.
Also, account for seasonal drift. The sun’s path shifts throughout the year, and trees may leaf out or lose foliage, changing how much light reaches your bed. If you’re planning for summer blooms, observe conditions during the growing season or estimate how nearby shade will change.
Record each section separately. One edge may get full sun while another stays shaded. Use those notes to match plants to their preferred light levels.
Check Soil Drainage
After noting sunlight patterns, check how quickly water drains from each part of the bed. Dig a hole about 12 inches deep, fill it with water, and let it empty. Refill it, then track how long the water takes to disappear. This simple test reveals the drainage rate and helps you spot areas where roots might sit in soggy soil.
Feel the soil texture, too. Sandy soil usually drains quickly, while clay holds water longer; loam often offers a useful balance. If water lingers, mix in compost to improve structure, or consider a raised bed. If it drains too fast, add organic matter to help retain moisture. Check after rain as well, since slopes, compacted paths, and low spots can create different conditions across your planting area.
Measure and Sketch Your Flower Bed Layout

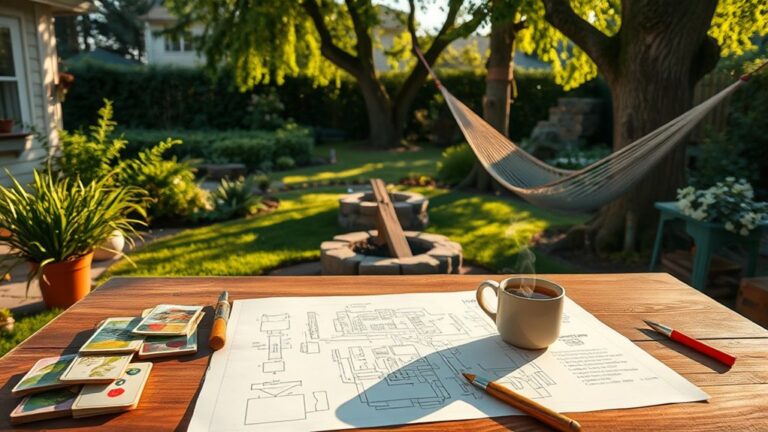
Before choosing plants, measure the flower bed’s length and width, then sketch its shape to scale. Use a tape measure to record each side, including curves, corners, and narrow sections.
For an irregular bed, divide the space into simple shapes, measure each one, and note the dimensions. These details help you measure the layout accurately and avoid guessing when you plan plant placement.
On graph paper, choose a scale that fits the entire bed, such as one square representing one foot. Mark the boundary, pathways, fixed features, and existing plants.
Label each measurement clearly, and add a compass direction so you can track where sunlight falls. If you prefer a digital tool, enter the same dimensions and compare its sketch scale with your paper drawing.
Check your measurements by repeating them, especially along uneven edges. Keep the sketch handy as you consider plant spacing and mature sizes.
A clear plan lets you use the available space thoughtfully and adjust your design before buying plants.
Prepare the Soil for Healthy Flowers
Check your soil’s drainage before planting to see how well it sheds excess water. Then, mix in organic matter to improve its texture and fertility. Finally, level the bed so your flowers have an even place to grow.
Test Soil Drainage
How quickly does water drain from your flower bed? A simple test can reveal whether roots will get enough air or sit in soggy soil.
Dig a hole about 12 inches deep and wide, then fill it with water. Let it drain completely to pre-soak the ground.
Refill the hole, and measure the water level. Check it after an hour: a drop of about 1 to 2 inches indicates good drainage.
If water remains or drains very slowly, choose plants that tolerate wet conditions or consider a better-drained location. If it disappears quickly, drought-tolerant flowers may suit the spot.
Test several areas, since drainage can vary across your bed. Record the results alongside soil acidity and pest management notes to guide your planting choices.
Add Organic Matter
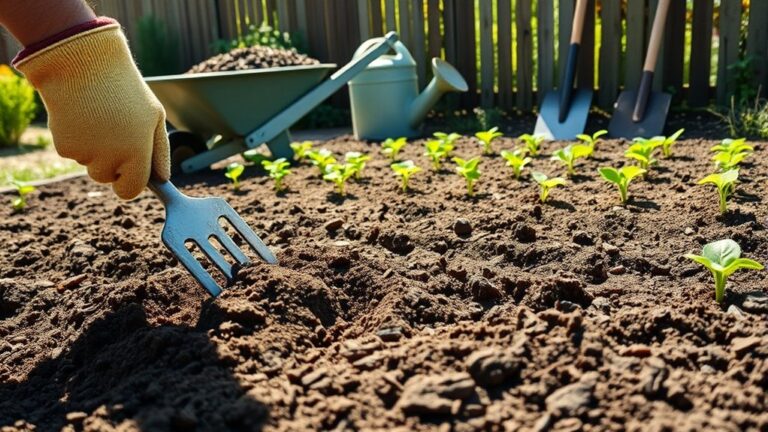
Once you’ve checked drainage, improve the soil with organic matter to help flowers grow strong roots and access nutrients. Spread a layer of finished compost over the bed, then work it into the top several inches of soil with a garden fork.
This compost incorporation boosts soil structure and helps sandy soil hold moisture while improving drainage in heavy clay. You’ll also feed beneficial microbes and supply nutrients that support healthy growth.
These organic matter benefits build gradually, so add compost regularly rather than relying on a single application. If your soil already contains plenty of organic material, use a lighter layer to avoid excessive nutrients.
Choose mature, weed-free compost, and remove large sticks or debris as you mix it in. Keep amendments suited to your soil test and the flowers you plan to grow.
Level The Bed
A level flower bed gives roots consistent access to moisture and helps prevent water from pooling in low spots. After adding organic matter, rake the soil to level the bed. Break up clumps and remove stones, roots, and debris as you work. Aim for a smooth surface, but don’t compact the soil; flowers need room for roots to grow and water to drain.
Check the grade with a straight board and a level, or stretch a taut string across the bed. Adjust high and low areas until the surface sits evenly. Keep the bed edges slightly raised if you want to define the planting area, but avoid creating a basin that traps water. Finish by lightly watering the soil to help it settle, then make any needed adjustments before planting.
Choose Flowers for Your Climate
Your local climate shapes which flowers will thrive, so check your region’s hardiness zone and typical growing conditions before choosing plants. Consider your area’s average temperatures, frost dates, rainfall, humidity, and wind exposure. Then compare those conditions with each flower’s growing requirements.
Match flowers to your hardiness zone, frost dates, rainfall, humidity, and wind for a better chance of thriving.
This climate matching helps you choose plants that can handle your garden’s natural conditions rather than struggle against them.
Pay attention to your bed’s sun and soil, too. A flower suited to your region may still fail if it needs full sun but your site stays shaded, or if it prefers well-drained soil while yours holds water.
Choose varieties that tolerate your typical summer heat and winter lows. If rainfall is limited or watering is occasional, prioritize drought tolerance. For wet areas, seek plants that cope with consistently moist soil. Ask a local nursery or extension service for recommendations suited to your location.
Starting with climate-adapted flowers can reduce maintenance, conserve water, and give your bed a stronger chance of thriving.
Plan Color and Seasonal Bloom Times
Plan your flower bed’s colors and bloom times to keep it attractive throughout the growing season. Choose a simple palette that suits your taste and the setting. You might combine related shades for a calm effect or use contrasting hues for a lively display. Either way, aim for color harmony by repeating a few colors rather than introducing too many.
Next, map seasonal bloom windows so flowers take turns providing interest. Check each plant’s expected flowering period in your region, then select varieties that cover early spring, summer, and fall. Include plants with overlapping bloom times, so a brief delay or fading flower won’t leave the bed looking bare.
Use this checklist:
- Pick two or three main colors.
- Add one accent color for contrast.
- Note each flower’s bloom months.
- Choose blooms that span the season.
Review your plan before buying. You’ll create a cohesive display with color and flowers to enjoy from one season to the next.
Arrange Flowers by Height and Spacing
Arrange taller flowers behind shorter ones so every bloom stays visible. Before planting, check each plant’s spacing guidelines. That way, roots have room to grow and plants won’t crowd one another.
Place Taller Flowers Behind
Place taller flowers behind shorter ones so every plant gets sunlight and remains visible. This simple arrangement creates depth and keeps blooms from disappearing behind larger neighbors.
Before planting, view your bed from the main path or window, then decide where each flower will make the strongest visual impact. Use layering height to guide the eye naturally from the front edge toward the back.
- Put low-growing flowers at the front, where you can see and enjoy their details.
- Set medium-height plants in the middle to create a smooth transition.
- Reserve the back row for tall varieties, especially along walls or fences.
- Turn taller behind shorter into a flexible rule, adjusting for slopes, focal points, and viewing angles.
Check the arrangement from several viewpoints. You’ll spot blocked blooms and can shift plants before digging. This thoughtful order gives your flower bed a balanced, welcoming look.
Follow Spacing Guidelines
Once you’ve layered flowers by height, check each plant’s recommended spacing to give it room to grow. Follow the label’s guidance, measuring between plant centers rather than leaf edges. Give spreading varieties extra room, and place compact flowers closer together without crowding them. Proper spacing improves airflow, reduces disease risk, and lets each bloom receive enough sunlight and water.
Use spacing patterns to create a design that feels intentional. Arrange flowers in drifts, staggered rows, or repeating clusters, then leave paths for easy access. Consider mature width, not just the size of young plants, so your bed won’t become overcrowded later.
Companion planting can help you group flowers with compatible light, water, and soil needs. Check each plant’s growth habits before pairing them, and adjust distances as needed. Your thoughtful layout will support healthy growth and a balanced display.
Add Foliage for Seasonal Interest
Foliage can carry your flower bed through every season, even when blooms fade. Choose plants for their leaves as carefully as you choose flowers for their colors. With thoughtful foliage layering, you’ll keep the bed engaging from spring through winter.
Layer foliage thoughtfully to keep your flower bed engaging through every season, even after the blooms fade.
Combine different shapes, sizes, and finishes to create texture blends that feel intentional rather than crowded. Strong seasonal contrast helps each plant stand out as leaves emerge, change color, or drop.
Use these four foliage strategies to build lasting interest:
- Mix leaf shapes: Pair broad hosta leaves with fine ornamental grasses for a lively contrast.
- Vary color: Combine deep green, silver, burgundy, and gold foliage to brighten muted areas.
- Plan seasonal changes: Include plants with autumn color or distinctive winter stems.
- Add evergreens: Use compact shrubs or ground covers to provide evergreen interest and structure.
Check mature plant sizes as you arrange these choices. You’ll create a cohesive bed that looks complete even between bloom cycles. Keep the strongest foliage near paths and seating, where you can appreciate its details up close.
Plant at the Right Time
When should you plant your flower bed? Check your region’s last expected spring frost and each plant’s preferred growing conditions. You can plant hardy perennials and cool-season flowers earlier, while frost-sensitive annuals need warmer soil and nights above freezing.
Use your local extension service’s calendar to choose dates that fit your climate.
Time seed selection as carefully as you time planting. Sow seeds indoors when packets recommend, allowing enough weeks for seedlings to grow before transplanting.
Direct-sow varieties that dislike root disturbance once the soil reaches their preferred temperature. For nursery plants, choose healthy specimens and plant them on a mild, cloudy day to limit transplant stress.
You’ll also want to avoid planting during heat waves, strong winds, or periods of heavy rain. Check forecasts before you set plants in the ground, and leave enough space for mature growth and airflow.
Good spacing supports pest prevention by making it harder for problems to spread and easier for you to spot them early.
Water, Mulch, and Maintain Your New Bed
After planting, water the bed thoroughly to settle soil around the roots, then add a layer of mulch to retain moisture and limit weeds. Check each plant’s water requirements, since sun exposure, soil, and species affect how often you’ll need to water.
Aim the hose at the soil, not the foliage, and water deeply so roots grow downward. Keep mulch a few inches from stems to prevent rot, and adjust mulch thickness to suit the material: fine mulch needs a thinner layer than coarse bark.
Use this routine to help your new bed thrive:
- Check soil moisture with your finger before watering; don’t follow a rigid schedule.
- Water early in the day to reduce evaporation and discourage fungal disease.
- Pull weeds while they’re small, before they compete with flowers.
- Remove spent blooms and damaged leaves to encourage fresh growth and keep plants tidy.
After heavy rain or hot, dry weather, inspect the bed and respond to changing conditions. Replenish mulch as it breaks down, but avoid piling it against plant crowns.
Watch for wilting, yellow leaves, or standing water; these signs can reveal that you need to change your care.
Frequently Asked Questions
How Can I Keep Pests Away From My Flower Bed?
Keep pests away by inspecting your flowers regularly, removing damaged leaves, and clearing weeds and debris where insects hide. Water at the soil level and avoid overcrowding to reduce disease and pest problems.
For how to deter pests naturally, attract beneficial insects with nectar-rich flowers and use barriers like row covers. Preventing pest damage with plants also means mixing strong-scented herbs, such as basil or rosemary, among flowers. Handpick larger pests and avoid broad-spectrum pesticides.
Are Raised Flower Beds Easier to Maintain Than In-Ground Beds?
Raised beds can make maintenance feel like tending a garden on a tabletop: you’ll bend less, control weeds more easily, and reach every plant without stepping into the bed. They also offer better soil drainage, which helps prevent waterlogged roots. However, you’ll need to water them more often because elevated soil dries faster, and you may need to refresh the soil.
In-ground beds usually cost less and need less frequent watering.
What Tools Are Essential for Starting a Flower Garden?
For a flower garden, you’ll need a hand trowel, garden fork, pruning shears, gloves, watering can or hose, and a sturdy spade. These essential tools help you loosen soil, plant flowers, trim growth, and water consistently.
A rake clears debris, while a hoe controls weeds. For an easy garden setup, keep your tools clean, sharp, and close at hand. You don’t need expensive gear; choose comfortable, durable basics that suit your space.
Can I Grow Flowers in Containers Alongside My Flower Bed?
Yes, you can grow flowers in containers alongside your flower bed. For example, place pots of trailing petunias beside your border to add color without taking up planting space.
Choose containers with drainage holes, and match each flower’s sunlight and watering needs to its location. You can also group compatible flowers in pots near the bed, but keep the containers accessible so you can water, feed, and move them as needed.
How Do I Attract Pollinators to My Flower Garden?
You can attract pollinators by offering diverse flowers, shelter, and fresh water. Choose pollinator friendly plantings with different colors, shapes, and heights to welcome bees, butterflies, and hummingbirds.
Plan seasonal bloom timing so something flowers from early spring through fall. Include native plants, which often suit local pollinators best, and group the same flowers together for easier foraging.
Skip pesticides, leave some bare soil or stems for nesting, and add a shallow water dish with stones.
Conclusion
With the right spot, healthy soil, and flowers suited to your climate, you’re ready to create a bed that thrives. Use your sketch to guide planting, give each flower room to grow, and mix in foliage for lasting interest.
Plant at the right time, then water deeply and add mulch to help retain moisture. Keep an eye on your garden and adjust care as needed. Before long, your carefully planned flower bed can brighten your yard like a thousand tiny suns.