10 Easy Steps to Grow Vegetables at Home
Growing vegetables at home can feel overwhelming when you’re short on space, unsure what to plant, or worried about keeping everything alive. You’re not alone—many people struggle to get started, but the right tools and a few simple steps can make home gardening much easier.
To grow vegetables at home, plan your space, schedule, and budget, then choose crops suited to your climate and growing area. Check sunlight, select containers or prepare a garden bed, and fill it with loose, healthy soil.
Water when the soil needs it, feed plants as directed, and add mulch to retain moisture. Protect crops from pests, install supports, and prune carefully.
Harvest vegetables when they’re ripe. Follow these simple steps, and you’ll discover how to enjoy a productive home garden.
Key Takeaways
- Choose a sunny, accessible spot and measure the space before planning your garden.
- Select vegetables suited to your climate, sunlight, and available space.
- Plant in containers with drainage or prepare a garden bed with loose, compost-enriched soil.
- Water when the soil needs it, feed as directed, and add mulch to retain moisture.
- Support climbing plants, check regularly for pests, and harvest vegetables when ripe.
Plan Your Home Vegetable Garden

Start by planning your garden around the space, sunlight, and time you have. Measure the area you can use, whether it’s a balcony, patio, windowsill, or yard. Note nearby walls, paths, and water sources so you can arrange your garden without blocking access.
> Plan your garden around the space, sunlight, and time you have, keeping paths and water sources accessible.
Watch the site at different times of day and record how much direct sunlight it receives. This planning space step helps you understand what your garden can support without guessing. Also check whether you can reach the area easily to water, tend, and harvest plants.
Set a realistic budget and schedule before buying supplies. Decide how often you can care for your garden, then choose a setup that fits your routine. Containers, raised beds, or in-ground plots each require different preparation, so consider the effort involved.
Leave room for tools and movement, and keep the layout simple. When selecting crops, focus on your goals and available capacity; you’ll make specific choices after assessing your conditions. A clear plan helps you start confidently and avoid costly changes later.
Choose Vegetables for Your Space and Climate

Choose vegetables that match your available space, sunlight, and local climate. If you’re growing in containers, pick compact plants such as bush beans, cherry tomatoes, or dwarf peppers. For a narrow balcony, grow upward with peas or cucumbers on a sturdy trellis. In a larger yard, you can choose sprawling squash or plant several rows of root crops.
Check your region’s growing season before buying seeds or seedlings. Some vegetables thrive in cool weather, while others need warmth to mature. Choose a vegetable variety suited to your area’s typical temperatures and frost dates; this climate compatibility can help you avoid poor growth and wasted effort. Your local extension service or seed packet can offer useful guidance.
Also consider how much produce you’ll actually eat. A few well-chosen plants often serve you better than a crowded garden. Start with easy, productive options, then try new crops as you learn what fits your space and climate. This approach keeps your garden manageable and rewarding.
Find the Right Amount of Sunlight

How much sunlight does your garden get each day? Track sunlight duration before you decide where to grow your vegetables. Watch the area at different times, noting when direct light reaches it and when shadows move across it. A sunny spot may receive less light than you expect if a wall, fence, or tree blocks the sun.
Most vegetables that produce fruit, such as tomatoes, peppers, and cucumbers, need about six to eight hours of direct sunlight daily. Leafy greens and some herbs can grow with less, often around three to six hours. Check the needs of the vegetables you’ve chosen, since too little light can slow growth and reduce harvests.
Include shading considerations as you observe your space. Nearby buildings and trees may cast longer shadows in the morning or late afternoon, while seasonal changes can shift the sun’s path. Choose a location that gives your plants suitable light throughout their growing season, and reassess it as conditions change.
Choose Containers or Prepare a Garden Bed
Once you’ve found a spot with enough sunlight, decide whether to grow your vegetables in containers or a garden bed. Your space, mobility, and the vegetables you want to grow can guide your choice.
Containers suit patios, balconies, and small yards, and you can move them to adjust their sun exposure. For good container choices, look for sturdy pots with drainage holes and enough room for mature roots. Avoid containers that have held chemicals, and make sure you can reach them easily for watering and harvesting.
If you have a yard, a garden bed gives you room to grow several plants together. Choose a level area that’s easy to access, then mark the bed’s boundaries with stakes or a hose.
Garden bed prep includes removing grass, weeds, rocks, and debris. Keep the bed narrow enough to reach its center from either side, so you won’t need to step on the growing area or strain while tending your plants.
Fill Your Growing Space With Healthy Soil
Fill containers or garden beds with healthy soil suited to the vegetables you plan to grow. Choose a loose, well-draining mix that holds enough moisture without becoming waterlogged.
For containers, use potting mix rather than dense garden soil, which can restrict airflow and drainage. In beds, loosen compacted soil and remove stones or debris.
Improve your soil’s structure and fertility with carefully chosen additions:
- Blend in finished compost to supply nutrients and support soil biology.
- Add leaf mold or coconut coir to help retain moisture while keeping soil airy.
- Mix in aged manure only when it’s fully composted and appropriate for your crops.
- Check the soil’s pH with a test kit, then adjust it if needed for your vegetables.
Learn composting basics so you can turn kitchen scraps and yard waste into a useful soil amendment. Avoid fresh manure and excessive fertilizer; both can damage roots or create nutrient imbalances.
Top up beds with compost as the soil settles, and keep the surface covered to reduce moisture loss and erosion. Your growing space is now ready for planting.
Sow Seeds or Plant Starter Vegetables
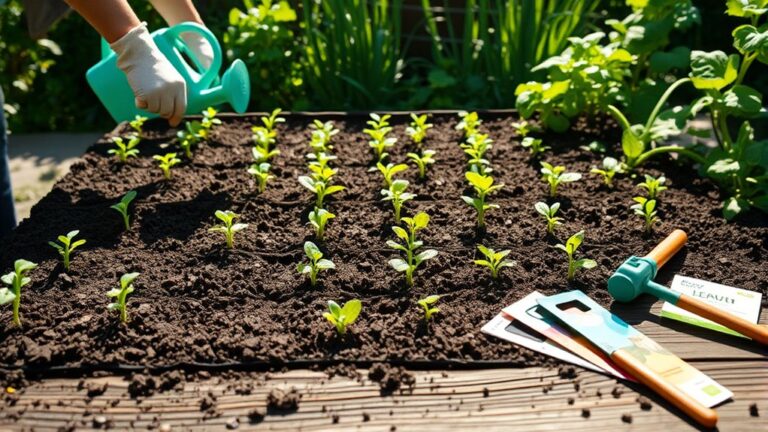
With your soil ready, choose seeds or starter plants suited to your space and season. Check each seed packet for planting depth, spacing, and days to maturity. Select compact varieties if you’re growing in containers, and match crops to your local planting calendar.
For seed starting, sow indoors when a crop needs a longer growing season or you want more variety. Use clean pots and a suitable seed-starting mix, then follow packet directions for depth. Label each container so you can identify young plants later.
Once seedlings develop true leaves, keep the strongest ones and remove crowded extras.
If you prefer a simpler start, buy healthy starter vegetables from a nursery. Look for sturdy stems, green leaves, and roots that aren’t tightly tangled. Before planting, gently loosen the root ball and set each plant at the depth recommended for that crop.
Give seedlings time to adjust outdoors by hardening them off gradually. Good seedling care helps young vegetables establish themselves in your garden.
Water Your Vegetables the Right Way
Water your vegetables deeply so the moisture reaches their roots. Before watering again, check the soil with your finger. If the top inch feels dry, it’s time to water.
Water Deeply
Consistent, deep watering helps your vegetables grow strong roots and withstand dry spells. When you water deeply, moisture reaches the lower soil, encouraging roots to grow downward instead of clustering near the surface.
This steady root hydration helps plants access water during hot, dry weather. Use these habits to water effectively:
- Direct water at the soil around each plant, not across its leaves.
- Apply water slowly so it can soak in rather than run off.
- Give newly planted seedlings gentle, focused watering to protect their roots.
- Water established vegetables thoroughly, adjusting the amount for plant size and weather.
A soaker hose or drip line can deliver water gradually to your garden beds. Aim for a steady routine that supports healthy growth without flooding your plants.
Check Soil Moisture
Before watering, check the soil to see whether your vegetables actually need it. Push your finger about an inch into the soil near each plant. If it feels dry at that depth, water; if it feels damp, wait and check again later. For deeper-rooted vegetables, test a few inches down, since the surface can dry while lower soil stays moist.
Check soil moisture in the morning, when you can spot dry plants before the day’s heat. Don’t rely only on wilted leaves: plants may droop in hot weather even when they have enough water. A simple moisture meter can help you judge conditions, but your finger works well for most home gardens.
Regular moisture monitoring helps you avoid both underwatering and soggy soil, which can stress roots and encourage disease. Adjust checks after rain or hot, windy days.
Feed, Mulch, and Protect Your Vegetables
Healthy vegetables need more than sun and water: they also need nutrients, protective mulch, and a little defense against pests. With thoughtful feed management, you’ll nourish crops without overdoing it. Follow these four practical steps:
- Choose compost or a balanced vegetable fertilizer, and follow the package directions. Too much fertilizer can burn roots or encourage leafy growth at the expense of produce.
- Apply nutrients when plants begin active growth, then feed again only when the product or crop requires it. Water afterward to help nutrients reach roots.
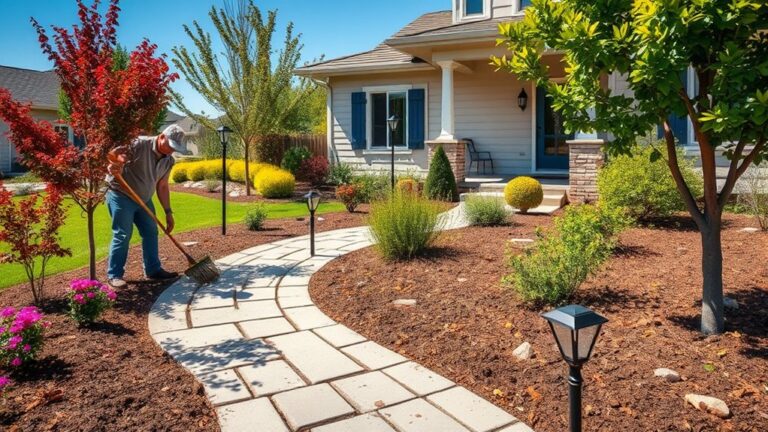
- Use mulch strategies that suit your garden: spread clean straw, shredded leaves, or untreated grass clippings around plants. Keep mulch a few inches from stems, and add a layer about two inches deep to conserve moisture and limit weeds.
- Check leaves regularly for holes, eggs, or insects. Remove pests by hand, use row covers when appropriate, and avoid harming beneficial insects. Clear diseased foliage promptly, and keep the bed tidy so problems don’t spread.
Support and Prune Plants as They Grow
Add stakes, cages, or trellises early so your plants can grow into them. As they grow, prune crowded leaves to improve airflow and reduce the risk of disease. Check your plants regularly, and adjust the supports or pruning as needed.
Add Supports Early
Install stakes, cages, or trellises while plants are small, so you won’t disturb their roots later. Support early to guide climbing crops and keep heavy stems upright as they grow. Choose a structure that fits each vegetable and your garden space.
- Set stakes beside young tomatoes, then tie stems loosely with soft garden twine.
- Place cages around peppers or compact tomato plants, securing each cage firmly in the soil.
- Add a trellis for peas, beans, or cucumbers; trellis growing saves space and keeps fruit easy to reach.
- Check ties and supports regularly, adjusting them as stems lengthen or produce becomes heavier.
Install supports before planting when possible, especially in tight beds. Anchor tall structures against wind, and avoid fastening stems so tightly that they can’t expand. With sturdy supports in place, you’ll make harvesting simpler and help plants stay upright through the season.
Prune for Airflow
Once supports are in place, prune crowded growth to improve airflow and reduce the risk of disease. Use clean, sharp snips to remove damaged leaves, weak shoots, and growth that rubs against neighboring stems. Don’t strip away too much foliage; leaves help feed your vegetables.
This simple pruning approach lets air and light reach inner branches. Prune selectively, matching each cut to the plant’s needs.
| Plant | What to remove | Benefit |
|---|---|---|
| Tomato | Lower leaves touching soil | Limits splash-borne disease |
| Cucumber | Tangled side shoots | Opens dense vines |
| Pepper | Damaged inner leaves | Improves air movement |
Cut just above a healthy leaf joint, and avoid tearing stems. For leafy crops, thin crowded leaves rather than cutting the growing tip, so plants can keep producing.
Check Growth Regularly
Check your plants every few days as they grow, since stems can outpace their supports and new growth can crowd nearby leaves. Regular monitoring helps you catch problems early and respond before they slow your harvest. Look for these growth milestones and adjust your care as needed:
- Tie climbing tomatoes, peas, and beans loosely to stakes or trellises; leave room for stems to thicken.
- Add support when fruiting branches begin to bend, using soft ties or a simple sling.
- Remove yellow, damaged, or crowded leaves with clean snips to improve airflow and limit disease.
- Check soil moisture and inspect leaf undersides for pests, especially after pruning or heavy rain.
As plants mature, keep supports stable and avoid cutting healthy growth indiscriminately. A quick check now can prevent broken stems and help your vegetables thrive.
Harvest Homegrown Vegetables at Their Peak
Picking vegetables at the right moment gives you the best flavor and texture. Good harvest timing also supports flavor enhancement, so check each crop’s signs of readiness instead of relying only on the calendar.
Harvest at the right moment for the best flavor and texture; look for each crop’s signs of readiness rather than relying on the calendar.
Look for rich color, firm skin, and the size listed on your seed packet. Tomatoes should feel slightly soft and come away easily; cucumbers taste best when they’re firm and still modest in size.
Harvest leafy greens when their leaves are tender, and pick beans before their seeds swell. Use clean scissors or a sharp knife to cut produce without damaging stems or roots.
Handle vegetables gently, since bruises can shorten their freshness. Pick in the cool morning, when plants retain more moisture, and bring your harvest indoors promptly.
Check plants often during peak season, because ripe vegetables can quickly become overripe. If you can’t use everything right away, refrigerate suitable crops or share extras.
Regular picking encourages many plants to keep producing, giving you more to enjoy.
Frequently Asked Questions
Can I Grow Vegetables Indoors Year-Round?
Yes, you can grow vegetables indoors year-round if you provide enough light, warmth, and care. Choose compact crops such as lettuce, spinach, herbs, and cherry tomatoes, and use space saving methods like shelves, hanging planters, or windowsill containers. Place plants near a sunny window or add grow lights for 12–16 hours daily. Water when the soil feels dry, ensure good drainage, and harvest regularly to encourage fresh growth.
How Much Does It Cost to Start a Home Vegetable Garden?
You can start a home vegetable garden for about $25–$100, depending on its size and what you already own. The cost of starting a garden stays low if you reuse containers, choose inexpensive seeds, and make your own compost. For a larger raised-bed garden, expect to spend $150–$400 or more on lumber, soil, and supplies. Try these budget friendly setup ideas: grow a few easy crops, borrow tools, and add equipment gradually.
Are Homegrown Vegetables Safe to Eat After Pesticide Use?
Yes, you can usually eat homegrown vegetables after pesticide use if you follow the product label. For example, if you spray tomatoes, wait the listed interval before harvesting; that helps reduce pesticide residue and protect food safety.
Wash produce under running water, and peel or discard outer leaves when appropriate. Don’t use pesticides on crops the label doesn’t list, exceed the recommended amount, or harvest before the stated waiting period.
How Can I Keep Pets Out of My Vegetable Garden?
You can keep pets out of your vegetable garden by creating clear boundaries and making the space less inviting. For effective pet proofing garden strategies, install a sturdy fence tall enough to discourage jumping, and secure gaps beneath it.
Investigate fence and netting solutions, such as lightweight mesh over beds or individual plant cages. Add a designated digging area elsewhere, use raised beds, and supervise pets until they learn to avoid your vegetables.
What Should I Do With Extra Vegetables After Harvesting?
Share extra vegetables with neighbors, donate them to a food pantry, or cook meals for later. For leftover storage, refrigerate sturdy produce, freeze chopped vegetables, or keep suitable crops in a cool, dry place.
Try creative preservation by pickling, fermenting, drying, or making sauces. Compost scraps you can’t use, and follow gardening ethics by avoiding waste and sharing fairly.
Check stored harvests regularly; remove spoiled pieces promptly to limit pest control problems around your kitchen and garden.
Conclusion
As you plan, plant, water, and protect your vegetables, you’ll notice how each small task fits together. One sunny morning, a ripe tomato, crisp lettuce, and climbing beans may all be ready at once, almost as if your garden planned the harvest for you.
That happy coincidence is the reward for choosing suitable plants, nurturing healthy soil, and tending your space. Keep learning as you grow, and you’ll turn a few seeds into fresh, homegrown meals with these 10 easy steps to grow vegetables at home.