7 Steps to Prepare Soil for Your Garden
Preparing garden soil can feel overwhelming when you’re unsure where to start or which products will make a difference. You’re not alone—many gardeners struggle to create the right conditions for healthy plants. These seven steps to prepare soil for your garden can help you get started.
To prepare soil for your garden, choose a sunny, well-drained spot near water. Clear weeds, roots, rocks, and debris, then test your soil’s pH and nutrients. Loosen compacted areas with a garden fork, avoiding wet soil.
Choose compost and amendments based on your test results, and follow recommended amounts. Spread materials evenly and work them into the root zone. Rake the bed level, water lightly, and let it settle. These steps set you up for healthy planting and more details ahead.
Key Takeaways
- Choose a sunny, well-drained location with at least six hours of direct sunlight and convenient access to water.
- Clear weeds, roots, rocks, and debris; remove invasive roots and dispose of mature weeds appropriately.
- Test soil pH and nutrients using samples from several spots, following the test instructions.
- Loosen compacted soil with a garden fork, and avoid working when the soil is wet.
- Select compost and amendments based on test results, spread them evenly at recommended rates, and mix them into the root zone.
Choose a Sunny, Well-Drained Garden Spot

Choose a sunny, well-drained spot before you prepare the soil. Most vegetables and many flowers need at least six hours of direct sunlight daily, so watch how light moves across your yard.
Check the area in the morning, midday, and afternoon to identify a reliable sunny spot. Nearby trees, fences, and buildings can cast shade or compete with garden plants for moisture and nutrients.
Next, assess drainage after rain or watering. A well drained site lets excess water move through the soil rather than pooling around roots.
If water remains on the surface for hours, choose another location or plan to improve drainage before planting. Avoid low spots where runoff collects, since saturated soil can limit root growth and encourage disease.
Consider access, too. Pick a place near a water source and somewhere you can reach easily for regular care.
Make sure the garden won’t block paths or conflict with existing outdoor uses. A thoughtful location gives your plants better growing conditions and makes gardening more convenient.
Clear Weeds, Rocks, and Debris

Pull out weeds, including their roots, so they don’t grow back. Then remove rocks, sticks, and other debris that could get in the way of planting. Once the garden bed is clear, it’ll be easier to work with and ready for soil preparation.
Remove Weeds and Roots
Pull weeds, roots, rocks, and other debris from the garden bed so they won’t compete with your plants or obstruct their roots. Focus first on weeds and their underground growth.
Grasp each weed near its base and pull steadily, loosening the soil with a hand fork if the roots resist. Remove as much of each root as you can; leftover pieces may sprout again.
This careful root removal helps prevent persistent weeds from returning and gives your plants more room to grow. For effective weed control, clear the bed before planting, then check it regularly for new growth.
Avoid composting weeds that have mature seeds or invasive roots, since they may spread when you use the finished compost. Dispose of them according to local guidance, and keep the cleared soil ready for planting.
Clear Rocks and Debris
Once you’ve removed the weeds and roots, clear rocks and debris from the bed. Pick up branches, litter, and other loose material by hand, then rake the surface to reveal anything buried.
For larger rocks, use a shovel or garden fork to loosen the soil before lifting them out. Careful clearing helps prevent obstacles from interfering with planting and root growth.
| Material | How to handle it | Why it matters |
|---|---|---|
| Small stones | Rake into a pile | Smooths the bed |
| Large rocks | Loosen and lift | Frees planting space |
| Branches | Collect by hand | Keeps rows clear |
| Litter | Remove and discard | Protects soil |
When removing stones, set aside clean ones for paths or edging. Don’t discard healthy soil clinging to rocks; shake it back onto the bed.
Finish by checking the area once more before loosening the soil.
Test Garden Soil pH and Nutrients
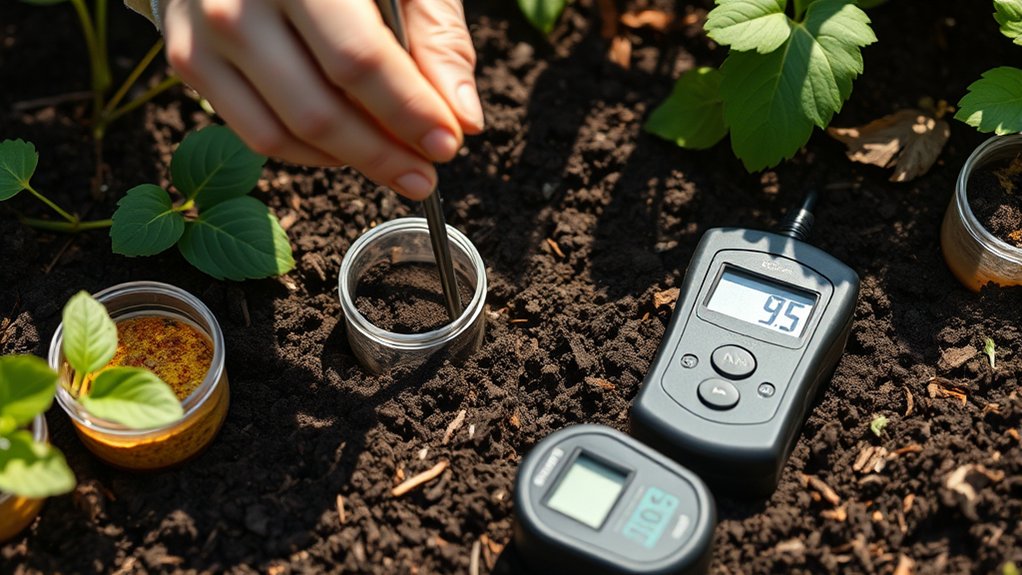
How well will your garden grow? The answer depends partly on your soil’s pH and nutrient levels. Before you add amendments, test garden soil pH so you can choose what your plants actually need. A test also reveals whether essential nutrients are too low or too high.
Pick up a home test kit at a garden center, or send a sample to your local cooperative extension or soil-testing lab. For a reliable sample, collect small amounts from several spots in the planting area, following the kit or lab’s instructions. Avoid sampling right after applying fertilizer or lime.
Read the results carefully. Soil pH affects how easily plants can access nutrients, and different crops prefer different ranges. Your report may recommend specific amendments and amounts. Follow those directions rather than guessing; adding too much can create new problems.
If you’re growing several types of plants, check their needs and prioritize a suitable range for your main crops. Keep the results handy as you plan your garden.
Loosen Compacted Soil for Better Drainage
After checking your soil’s pH and nutrient levels, see whether it’s compacted. Press a garden fork into the ground. If it meets strong resistance, or water pools on the surface instead of soaking in, your soil may be too dense. Compaction restricts airflow and makes it harder for roots to grow.
Choose a time when the soil is slightly moist, not wet. Working saturated soil can squeeze its particles together and worsen compaction.
Use a garden fork or broadfork to loosen soil, pushing the tool several inches down and gently rocking it back and forth. Repeat across the bed, spacing your efforts evenly. For a small area, a hand fork may be easier to control.
Avoid turning the soil over more than necessary; deep, vigorous digging can disturb its structure. Once loosened, let the ground settle naturally. This simple step can improve drainage, help roots reach deeper, and make it easier for your garden plants to access air and water.
Choose Compost and Soil Amendments
Choose compost that fits your garden’s needs, and make sure it’s fully decomposed. Then, select other amendments based on your soil’s specific deficiencies. Apply only the recommended amount to improve your soil without overdoing it.
Choose the Right Compost
Good compost adds organic matter, improves soil structure, and supports beneficial organisms. To choose compost, consider its source, maturity, and intended use. These compost types offer different benefits:
| Compost type | Source | Key feature |
|---|---|---|
| Yard-waste | Leaves, clippings | Widely available |
| Food-scrap | Kitchen scraps | Nutrient-rich |
| Manure-based | Animal manure | Often nutrient-dense |
| Mushroom | Spent mushroom substrate | May contain added minerals |
Choose finished compost that’s dark, crumbly, and earthy-smelling. Avoid material that’s hot, slimy, or strongly sour; it may still be decomposing.
Check labels for ingredients and avoid products with contaminants or undeclared additives. If you’re buying bagged compost, compare options and select one from a reputable supplier.
You can also make compost at home, provided you manage the pile well and let it mature fully. A quality product gives your garden a dependable source of organic matter.
Match Amendments to Soil
Once you’ve selected compost, match any other amendments to your soil’s specific needs. Start with a soil test so you know your soil pH, nutrient balance, and texture before choosing products.
If your soil is too acidic or alkaline for the plants you want to grow, select a suitable amendment to adjust pH. Add nutrients only when test results show a deficiency; excess fertilizer can harm plants and wash into waterways.
For dense clay, organic matter can improve structure and drainage, while sandy soil may benefit from amendments that help retain moisture and nutrients. Consider your garden’s crops, too: leafy greens and fruiting plants don’t always need the same nutrient profile.
Read product labels and choose amendments that address identified problems, rather than adding materials by guesswork. This helps you build healthier soil for your garden.
Apply the Correct Amount
How much compost or amendment should you apply? Start with a soil test, then follow its recommendations and the product label. The right amount depends on your soil’s condition, garden size, and the plants you’re growing. More isn’t always better: excess compost or nutrients can harm roots, disrupt soil balance, or wash into waterways.
- Measure your bed’s length and width to calculate its area.
- Use the label’s rate to determine how much material you need.
- Spread amendments evenly, then mix them into the topsoil as directed.
If you lack test results, add a modest layer of finished compost rather than guessing with concentrated fertilizers. Treat “idea one” as your reminder to measure first, and let “topic two” prompt you to check compatibility. Retest periodically, then adjust future applications based on results and plant growth.
Work Amendments Into the Garden Soil
With your soil test results in hand, you can choose amendments that address specific nutrient or pH needs. Spread each material evenly over the garden bed, following the recommended amounts. Then use a garden fork, spade, or tiller to blend it into the soil. Work carefully so you distribute amendments through the root zone rather than leaving concentrated pockets.
For compost or other organic matter, mix it into the top several inches of soil. This improves soil texture and supports microbial activity as organisms break down the material.
If you’re adding lime or sulfur, incorporate it thoroughly so it can contact the soil. These products may take time to change pH. Avoid working wet soil, which can compact easily and form clods. If the ground sticks to your tools or feels muddy, wait until it crumbles when squeezed.
Keep amendments out of planting holes unless directions call for targeted placement, and wear gloves when handling materials. Follow label instructions for safe use.
Level the Bed and Let Soil Settle
After mixing in amendments, rake the bed to create a level surface, breaking up clods and smoothing low spots. As you level the bed, pull soil from high areas into hollows, then check the surface from several angles. A flat, even planting area helps water spread more consistently and makes sowing seeds easier.
- Use a sturdy rake to move soil without compacting it.
- Keep paths and bed edges clear so runoff won’t wash soil away.
- Avoid pressing down hard; roots need loose, airy ground.
Next, water the bed lightly to help the soil settle. Don’t soak it: excessive water can compact the surface or create puddles. Wait a day or two, then inspect the bed.
If settling has exposed dips or raised ridges, rake them smooth and add a little soil where needed. You can also let soil settle naturally after rain, as long as the ground isn’t waterlogged. Once the surface stays even, your bed is ready for planting.
Frequently Asked Questions
When Is the Best Time of Year to Prepare a Garden Bed?
The best time to prepare a garden bed is fall or early spring, before you plant. Fall gives amendments time to break down over winter, while early spring lets you work the soil as soon as it’s dry enough.
Choose your best planting season based on your crops and local climate. For dormant soil prep, spread compost in fall, but avoid digging when the ground is wet—you could compact it and harm its structure.
How Deep Should Soil Be Prepared for Different Plants?
Give your plants room to stretch their underground legs: prepare soil about 6–8 inches deep for shallow-rooted greens, 8–12 inches for most vegetables and flowers, and 12–24 inches for deep-rooted crops such as tomatoes or carrots. These soil depth guidelines vary with plant specific rooting zones, so check each variety’s needs. Loosen compacted layers below the prepared bed when roots must travel farther, but avoid disturbing healthy soil more than necessary.
Should I Wear Protective Gear While Preparing Garden Soil?
Yes, you should wear protective gear while preparing garden soil. Put on sturdy gloves to protect your hands from sharp debris, irritants, and soil-borne germs. Wear closed-toe shoes, long sleeves, and eye protection when digging or handling compost. A dust mask can help if the soil is dry or dusty.
These safety considerations reduce common risks, and you’ll stay more comfortable. Wash your hands and tools afterward, especially before eating or touching your face.
How Can I Prevent Soil Erosion in a Garden?
You can prevent soil erosion by keeping soil covered and slowing runoff. Plant ground covers, shrubs, or native grasses, and spread mulch around plants to protect bare areas. Add compost to improve soil stability and help water soak in.
On slopes, build terraces or low retaining walls, and arrange plants across the slope rather than downhill. Direct gutters and paths away from exposed beds. Check your garden after heavy rain and repair bare spots promptly.
What Tools Are Essential for Preparing a Garden Bed?
For garden bed prep, gather a spade to turn soil, a garden fork to loosen it, and a rake to level it. Add a hand trowel for planting, a hoe for removing weeds, and a wheelbarrow for moving compost or debris. These essential tools help you work efficiently and protect your back. Wear sturdy gloves, too, so you can handle rough materials safely while preparing a clean, workable bed for planting.
Conclusion
Prepare your garden by choosing a sunny, well-drained spot, clearing weeds and debris, and testing your soil. Loosen compacted ground, choose amendments that fit your soil’s needs, and work them in evenly. Then level the bed and let it settle.
Each step helps you build a healthier start for your plants: better light, cleaner soil, stronger structure, balanced nutrients, and room for roots to grow. Take the time now to prepare soil for your garden, and you’ll give your plants a better chance to thrive.