How to Turn Grass Into a Garden in 10 Easy Steps
Turning a patch of grass into a garden can feel like a big project, especially when you’re not sure where to start. You’re not alone—many people struggle to remove sod, prepare the soil, and choose the right plants. These simple steps can help you turn grass into a garden that’s ready to grow.
To turn grass into a garden, choose a sunny, well-drained spot and select plants suited to your climate. Gather a spade, fork, rake, finished compost, and mulch, then mark the bed and remove the sod, roots, and weeds. Loosen the soil, mix in two to three inches of compost, and rake the bed level. Plan plant spacing, sow seeds or set out transplants, then water deeply and mulch. Protect young plants from harsh sun and cold as they establish. Further steps can help your new garden thrive.
Key Takeaways
- Choose a well-drained spot with suitable sunlight, convenient access, and enough room for plants and paths.
- Mark and measure the bed, then remove grass, weeds, stones, and roots.
- Loosen the soil with a garden fork, broadfork, or careful tilling; avoid working wet ground.
- Spread two to three inches of finished compost and mix it into the top few inches of soil.
- Plan spacing, plant seeds or transplants as directed, then water deeply and add two to three inches of mulch.
Choose Where to Turn Grass Into a Garden

Where should you turn your grass into a garden? Start by watching your yard throughout the day. Choose a spot that gets the amount of sunlight you’ll need for your gardening plans, and note where trees, fences, or buildings cast shade. Don’t select a location until you’ve observed it in different weather and seasons.
Check how water moves across the lawn. Avoid low areas where rain collects, since soggy soil can damage roots and delay work. A gentle slope with good drainage is easier to manage. Also consider access to a hose, tools, and a path from your home, so routine care won’t feel like a chore.
Think ahead about convenience and protection. A site near the kitchen may make harvesting easier later, while a visible area can help you notice weeds or signs relevant to pest management. Leave enough room to work comfortably, and consider how your location may affect germination timelines when you plan future planting.
Choose Plants for Your Garden
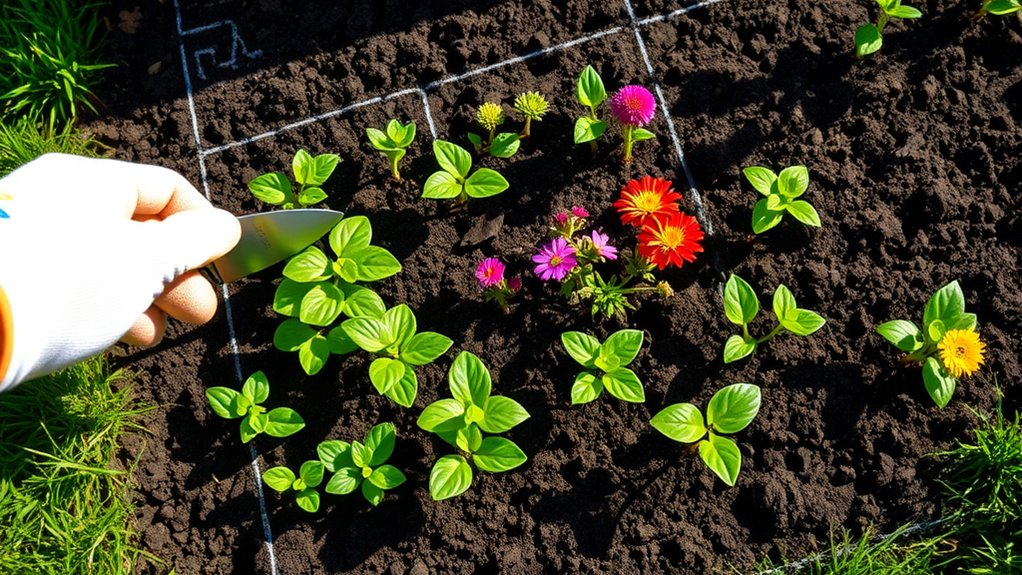
Check how much sun your garden gets, and test your soil before choosing plants. Then pick varieties that suit those conditions and your gardening goals. You can also plan seasonal planting so you can enjoy harvests or blooms throughout the year.
Assess Sunlight And Soil
Before choosing plants, note how many hours of sunlight each part of your yard gets and whether the soil drains well or stays soggy. Track light at different times of day for several clear days. This sunlight assessment helps you understand how exposure changes across the space and where shade falls.
Next, check how water moves through the ground. After rain, look for puddles and note how quickly they disappear. To investigate drainage, dig a small hole, fill it with water, and see how long the water takes to drain.
For soil testing, use a home kit or send a sample to a local extension service. Check pH and nutrient levels, and record the results. These observations give you a clear picture of your garden’s conditions before you make planting decisions.
Choose Suitable Plant Types
With your yard’s sunlight, drainage, and soil in mind, choose plants suited to those conditions and your local climate. Check plant labels for mature size, water needs, and light preferences so you won’t crowd your new beds. If you’re unsure about soil testing results, ask a local extension service or nursery for recommendations.
| Plant type | Best fit | Garden benefit |
|---|---|---|
| Native flowers | Local conditions | Support pollinators |
| Leafy greens | Partial shade | Provide edible harvests |
| Drought-tolerant herbs | Dry, sunny spots | Need less watering |
Choose a mix that matches your goals, whether you want fresh food, colorful blooms, or both. Favor disease-resistant varieties, and group plants with similar needs to simplify care. Consider pest management, too: select sturdy plants and avoid varieties known to struggle in your area. You’ll build a garden that’s easier to maintain and more likely to thrive.
Plan Seasonal Planting
Once you’ve chosen plants suited to your yard, plan when to plant them. Check your region’s frost dates and each plant’s recommended sowing or transplanting window. Cool-season crops, such as peas and lettuce, thrive in spring or fall, while tomatoes and peppers need warm soil and frost-free weather.
For flowers and perennials, follow local guidance on planting times so roots can establish before heat or cold arrives.
Use a calendar to map planting dates, harvests, and repeat sowings. Match the schedule to your garden layout, grouping plants with similar sunlight and watering needs. Leave room for mature growth and access paths.
Plan soil preparation ahead of each planting window; amend beds and remove weeds before seeds or seedlings go in. Staggering crops can extend harvests and keep your garden productive through changing seasons.
Gather Tools, Compost, and Mulch

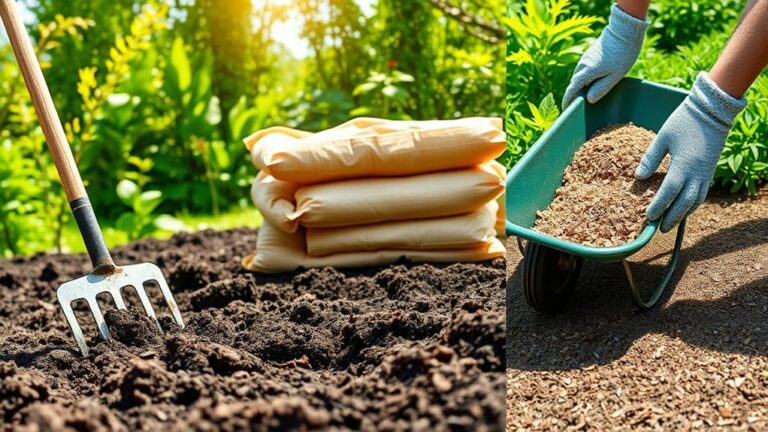
What do you need to turn a patch of grass into a garden? Gather sturdy gloves, a spade, a garden fork, a rake, and a wheelbarrow before you begin. Sharp, clean tools make digging and moving materials easier, while gloves protect your hands from blisters and debris. Keep a hose or watering can nearby, too.
Choose finished compost that’s dark, crumbly, and earthy-smelling. Check its compost maturity: immature material may heat up or contain recognizable scraps, and it can hinder seed germination. If you’re unsure, let it cure longer or buy screened, ready-to-use compost. You’ll need enough to enrich the soil across your future growing area.
Select mulch suited to your plants, such as straw, shredded leaves, or untreated wood chips. Straw and leaves work well around vegetables; wood chips suit paths and perennial beds. Store compost and mulch where they’ll stay dry and accessible. Having supplies ready helps you work efficiently once you start preparing the ground.
Mark Out Your Garden Bed
Choose a sunny, easy-to-reach spot for your garden bed. Measure the area to make sure it fits your plants and yard. Then mark the boundaries with stakes and string or a garden hose.
Choose Bed Location
Where will your garden get the sun, drainage, and access it needs? Choose a spot that receives the light your planned plants require, checking how nearby trees or buildings cast shade throughout the day. Avoid low areas where water pools after rain, and favor ground that drains well.
You’ll also want a convenient route from your home and a nearby water source, so caring for the bed won’t feel like a chore.
Before settling on the location, consider what grows nearby. Keep the bed away from trees with spreading roots, which can compete for water and nutrients. A suitable site also supports pest prevention by avoiding dense, neglected corners where pests may hide.
Once you’ve picked a promising area, plan soil testing to learn what amendments the ground may need before planting. Mark the chosen bed’s outline clearly.
Measure Garden Space
With your garden site selected, measure the space before you break ground. Decide how much room you can maintain and what you plan to grow. Check plant labels or a garden plan for spacing needs, then estimate the bed’s length and width to provide enough growing area without crowding nearby paths, trees, or structures.
Use a tape measure to record the available dimensions, and note them in a sketch. Include access for watering, harvesting, and routine care so you can reach plants comfortably. Consider sunlight patterns and drainage across the measured area, since these affect where different crops will thrive.
Account for compost placement, too, leaving practical space to add and spread it. If you’ve tested soil pH, keep the result with your measurements; it can guide plant choices and later soil amendments. Recheck your figures before moving on.
Mark Bed Boundaries
Once you’ve measured the space, mark the bed’s outline on the ground so you can see its size and shape before removing the grass. Use a garden hose, rope, or flour to trace the edges. A hose works well for curved beds, while stakes and string help you create straight lines.
Walk around the outline and check it from different angles. Adjust the shape if it feels awkward or blocks a path, window, or access to a hose. Keep enough room to reach every part of the bed without stepping on the soil.
When you’re satisfied, mark boundaries with landscape paint or small stakes so they stay visible as you work. A clear outline makes the grass to garden transition easier and helps you remove only the turf inside the bed.
Choose a Grass-Removal Method
How you remove the grass depends on your timeline, budget, and how much effort you want to invest. Match your method to your garden design: a small bed may need only hand tools, while a larger grass conversion may call for a faster approach. Consider these options before you choose:
- Dig it out: Cut and lift sod with a spade for quick results, but expect strenuous work.
- Smother it: Cover grass with cardboard or opaque sheeting; wait several weeks for it to die.
- Solarize it: Secure clear plastic over the area during sunny weather. Heat can kill grass, though treatment takes time.
- Use a sod cutter: Rent one to remove turf efficiently across a broad, level bed.
- Apply herbicide: Use a suitable product only as directed, and check local rules and planting intervals.
Choose based on the area’s size, your schedule, and your comfort with tools or chemicals. If you’re unsure, start with a small section and see how the method works before tackling the entire marked bed.
Clear Debris and Loosen the Soil
Clear away rocks, roots, and leftover sod so they won’t interfere with planting. After grass removal, inspect the bed for buried stones, thick roots, and stubborn clumps of turf. Use a garden fork or rake to collect debris, then dispose of it or set aside healthy soil for later use. Pull out weeds, including their roots, to reduce regrowth.
> Remove stones, roots, sod, and weeds from the cleared bed to prevent obstacles and reduce regrowth.
Loosen the ground once the surface is clear. Push a garden fork into the soil, rock it gently, and lift the earth without turning it into fine dust. Work across the bed in rows, breaking up compacted sections and removing any remaining sod fragments.
For a small plot, a hand cultivator can reach tight spots. For a larger area, use a broadfork or tiller carefully. Stop if the soil is wet, since working it then can create dense clods.
This preparation gives roots room to grow and makes it easier to blend in a soil amendment in the next step.
Add Compost to Improve the Soil
Choose finished compost for a safe, nutrient-rich boost. Spread a generous layer over your garden bed, then mix it evenly into the soil. This improves the soil’s structure and gives your plants a stronger start.
Choose Finished Compost
Once you’ve removed the grass, enrich the exposed soil with finished compost. Choose material that’s dark, crumbly, and earthy-smelling, with no recognizable food scraps or fresh plant pieces. Mature compost supports soil structure and beneficial organisms, helping your future garden thrive. These finished compost benefits make quality worth checking before you use it.
Look for compost made from varied organic materials, such as leaves and vegetable scraps. If you’re buying it, ask how it was produced and whether it’s fully cured. Avoid compost that smells sour, feels slimy, or heats up noticeably; it may still be breaking down.
Use these compost application tips to assess your choice:
- Check for a uniform, fine texture.
- Look for a rich brown or nearly black color.
- Choose a pleasant, earthy scent.
- Confirm it feels cool and moist, not soggy.
- Skip batches with weeds, trash, or large chunks.
Spread A Generous Layer
With finished compost ready, spread a generous, even layer over the exposed soil to add organic matter and improve its structure. Aim for about two to three inches across the future bed, adjusting for your soil’s condition and the compost’s texture.
Use a rake to distribute it evenly, filling shallow dips without burying the area under an excessive mound. This soil amendment helps loosen dense ground, support moisture retention, and provide nutrients as your garden develops.
For successful grass conversion, cover the entire planting space, including edges where turf may remain. Keep the layer consistent so plants will have similar growing conditions throughout the bed.
If you’re preparing a large area, work in manageable sections and check coverage from several angles. Save any extra compost for later planting or top-ups.
Work Compost Into Soil
Work the compost into the top few inches of soil with a garden fork or hoe, breaking up clumps as you go. Blend it evenly rather than leaving a thick layer on the surface.
This helps roots reach nutrients and improves soil texture, drainage, and moisture retention. Check compost quality before mixing: it should smell earthy, feel crumbly, and contain no fresh manure or recognizable food scraps.
- Remove stones, roots, and weeds as you loosen the ground.
- Mix compost into heavy clay to help air and water move through.
- Add it to sandy soil to help hold moisture and nutrients.
- Keep the blend loose; don’t compact it by walking over the bed.
- Rake the surface smooth before planting.
If your soil already contains plenty of organic matter, use less compost. A balanced mix gives new plants a healthier start.
Rake the Bed and Plan Plant Spacing
Before planting, rake the bed smooth to remove stones, roots, and clumps of soil. Break up any remaining lumps, then level the surface so water won’t collect in low spots. A tidy bed supports healthy growth and improves garden aesthetics as you transform your lawn.
Plan spacing before you set anything in place. Check each plant’s mature width on its label or in a trusted guide, and leave enough room for air circulation and access. Your grass introduction may have shaped the bed’s outline; now use that space efficiently without crowding plants.
| Plant type | Spacing guide |
|---|---|
| Leafy greens | 6–12 inches |
| Compact herbs | 8–12 inches |
| Bushy flowers | 12–24 inches |
Treat these ranges as starting points, not fixed rules. Adjust for variety, soil, and available room. Sketch rows or clusters on paper, keeping taller plants from shading shorter neighbors. Mark the planned positions with small stakes or a light line in the soil. This simple layout helps you avoid gaps and overcrowding.
Plant Seeds or Transplants
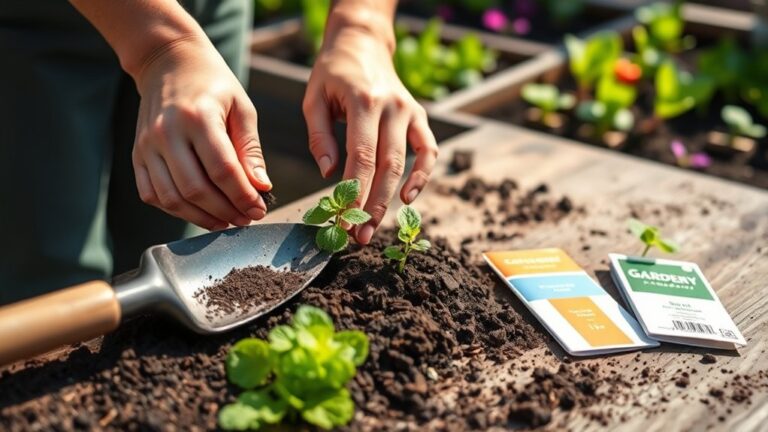
Once you’ve marked each planting spot, sow seeds or set out transplants according to their labels. Check the packet or tag for seed depth, seed spacing, and transplant timing; these details help each crop establish without crowding its neighbors.
Check each label for planting depth, spacing, and timing to help crops grow well without crowding their neighbors.
Prepare each spot before planting, and handle seedlings gently to protect their roots.
- Make shallow furrows for small seeds, using a stick or your fingertip.
- Drop larger seeds into individual holes at the listed depth.
- Cover seeds lightly with soil, then firm the surface with your palm.
- Dig transplant holes slightly wider than each root ball.
- Set seedlings at the same soil level they grew in their containers.
If a seed packet calls for thinning, sow a little extra and remove weaker sprouts later. For transplants, loosen tangled roots gently and position each plant upright.
Keep labels nearby as you work, so you can identify varieties and follow their specific planting directions. Take your time placing each crop; accurate planting gives your new garden a well-organized start.
Water, Mulch, and Care for New Plants
How much water your new plants need depends on their type and the weather, but most benefit from a gentle, thorough soak right after planting. Water at the base to reach the roots without washing away soil or flattening seedlings.
Check moisture daily during the first week, then adjust your watering strategies as plants establish. Give them a deep drink when the top inch of soil feels dry, and water in the morning to reduce evaporation and disease.
Spread a two- to three-inch layer of mulch around plants, keeping it clear of stems. Mulch choices include shredded leaves, straw, or untreated wood chips; match the material to your plants and garden style. Mulch helps soil retain moisture, suppresses weeds, and moderates temperature.
Inspect your garden often for wilting, pests, or damaged leaves. Remove weeds while they’re small, and protect tender plants from harsh sun or cold snaps. Follow seed-packet spacing and care guidance, and avoid heavy feeding until plants show healthy new growth.
Frequently Asked Questions
How Can I Protect a New Garden From Rabbits and Deer?
Protect your new garden with sturdy fencing: use 2-foot wire mesh buried a few inches to deter rabbits, and a 7- to 8-foot fence to keep deer out. Secure gaps and gates, since both animals squeeze through openings.
Add wildlife deterrents, such as motion-activated sprinklers or lights, and rotate them to prevent habituation. Cover young plants with garden netting, and remove fallen fruit or other food that might attract hungry visitors.
What Should I Do if Weeds Return After Planting?
When weeds return after planting, pull them promptly, mulch exposed soil, and keep watering near plant roots. You can reduce weed control challenges by catching seedlings before they set seed; one plant can produce thousands of seeds, depending on its species. Check soil testing results before adding fertilizer, since excess nutrients may encourage weeds. Avoid disturbing soil unnecessarily, and use a hoe carefully around crops. If weeds persist, identify them and choose a targeted, garden-safe method.
How Can I Test My Garden Soil for Contamination?
To test your garden for soil contamination, collect samples and send them to an accredited soil-testing laboratory. Ask for lead testing, especially if your home is older, sits near a busy road, or has a history of industrial use.
Follow the lab’s instructions for sampling several spots and depths, and use clean tools. Don’t mix samples from different areas. Until results arrive, wear gloves and wash your hands after handling soil.
When Is the Best Time of Year to Expand a Garden?
You’ll usually get the best results by expanding your garden in early spring or fall, when mild weather won’t roast new plants for sport. Your best planting season depends on your climate and what you’ll grow; check local frost dates before choosing.
Start seasonal soil preparation several weeks ahead: test the soil, remove grass and weeds, and add compost if needed. Avoid working soggy soil, unless you enjoy sculpting mud more than gardening.
Can I Grow Vegetables in a Garden Near a Busy Road?
Yes, you can grow vegetables near a busy road, but you should reduce exposure to traffic pollution. Air quality impacts vary with traffic, wind, and distance, so growing near road conditions deserve care.
Place beds as far from traffic as possible, and use a solid barrier or dense hedge to block dust. Wash produce thoroughly, peel root crops, and remove outer leaves.
For heavy traffic, consider growing food in containers farther away.
Conclusion
You’ve turned a patch of grass into a living garden, one thoughtful step at a time. As your plants settle in, the old lawn quietly gives way to something more welcoming: a little refuge for birds, pollinators, and you.
Keep watering, tending, and adjusting as the seasons change. Your garden won’t need perfection to flourish. Before long, you’ll have a greener corner to enjoy and a gentle reminder that small beginnings can grow into something lovely. Turning grass into a garden is a simple way to create a space that welcomes both you and nature.